Saturday, July 13, 2013

A flight of frozen treats

Recently, the folks at Tom Bihn asked us to make some different ice cream flavors for a block party block-party-at-the-tb-seattle-factory-youre-invited . We are excited to go and to see many of our friends - you're invited.


Our family tradition of making ice cream must have gotten out. David wanted to make sure any story about ice cream included a shout out to our beloved Ice Cream Boy freezer, which has its own freezer function and sits our on the counter, ready to turn ingredients into ice cream at any moment.

My first thought was to make a bunch of blackberry sorbet and some vanilla ice cream, our family favorites. But the idea of bee pollen ice cream kept coming up.

And I thought we could use honey as a sweetener for the vanilla. We found that Japanese knotweed honey was too strong and fennel honey was too medicinal. Mild, simply flavored blackberry honey was the winner.

Then it dawned on me - the common theme here is the blackberry. We can use its honey, its fruit, its pollen (mostly - we collect bee pollen but it's always a mixture) and maybe even the leaves. We can make a trio of blackberry themed ices.


When I moved to Seattle almost 20 years ago, one of my first cultural observations had to do with blackberries.

Where I had lived before, I had to beg and plead with friends to get them to come pick blackberries with me. They thought it was a waste of time, they fussed about bugs and dirt, they didn't know how to use the berries after they were picked.

Here in Seattle, picking blackberries just happens. People nibble them as they walk, or fill a bowl with them at the park. No one sees much bothered by the occasional bug, and although they may bring a bunch home and wash them, few shy away from eating them straight from the bush, dirt and all.

Partly, we do this because there are so many of these berries around. The Himalyan blackberry is a very successful invasive plant species. Wherever something isn't already growing, it pops up. The plants are pushy, thorny, and hard to erradicate.

The berries are not as good as the native blackberry, but they're still plenty good enough for normal purposes. They are good enough that most Seattlites even find the smell of the leaves appetizing, as it reminds them of the berries.


As beekeepers, the blackberry is one of the three main honey crops in our area. If it were somehow successfully erradicated, beekeepers would be hard pressed to find another nectar source so abundant in the early summer months.

Every Spring, bees get their first big shot of nectar from the maple trees, which have little, inconspicuous flowers but provide abundant nectar at time when little else is out.

Then come dandelions, which help out a bit but mostly give pollen. For those who can move their bees to the hills, the fireweed is another great source of nectar, but this is a huge round trip to make with a truckload of beehives.


During summer, at our low elevation, the blackberry crop is the source of most honey. We notice when the first flowers open, and track them closely. They only make nectar when the temperature is above the mid-sixties, and they only make a lot of nectar if they get enough rain. Rainy weather is usually not very warm. So - not every year is going to be a great one for the blackberry honey crop.

This year had been a good one for blackberry honey.
It's pale, sweet, low in acidity, and almost icy in its purity of flavor. Some other honeys have citrusy or syrupy or spicy notes, but blackberry honey tastes j like honey. It crystalizes very easily, forming "honey butter" that's great to spread on things, and then becoming even more solid, almost like a chunk of sugar. It was this iciness - both of flavor and in its ease of forming crystals - that first gave me the idea of using it as our honey of choice in ices and ice creams.


Then come the berries. Big, coarse, seedy, they only remain good for a few hours after picking. Then they grow tufty white mold. So when we get a big batch of them we process them ASAP. The seeds are big enough and numerous enough to be a real distraction in jam, so we tend to strain them out and use the pulp in sauces and syrups. But our very favorite is blackberry sorbet. The ripening season has just begun, so we made our sorbet using some of last year's harvest, which we can or freeze and enjoy all year long.

Blackberry leaf tea is used medicinally to help sore gums and to tone the digestive system. It's a mild astringent. Really I wasn't thinking about its health benefits though. My hope was to infuse the ice with some of the mouth watering fragrance of brushing past blackberry leaves and knowing the berries will be ready soon.Half the pleasure of blackberries is the anticipation, and to me the leafy scent is part of it.


Recipes


Blackberries are so dark and rich in flavor, it's incredible that their honey is so pale and rarified. I love the contrast. If you make and serve this trio of desserts, I suggest enjoying them in the order they are listed.


We served them at home with shortbread, just to make sure they were good enough for the event.

All recipes assume you have an ice cream maker of some kind.

Honey Ice

The honey ice is richer than it sounds, and so intense it's almost painful. It's not sticky like eating honey. It has a sweetness that's at once over the top and rarified, like breathing mountain air that's a little too thin for comfort. It would probably be unpleasant to eat after the creaminess of the ice cream.

Ingredients:

1 Cup Honey
2 Cup Water
1 Cup blackberry leaves (optional)

Instructions:

(Optional) Heat water to boil, pour over blackberry leaves and steep for 1 hour, strain
Combine water or tea and honey, heat and stir to dissolve
Cool in refrigerator at least 2 hours
Churn in ice cream maker until frozen.
Place in containers and freeze at least 2 hours

Honey and Pollen Ice Cream

The ice cream is smoother, easier to eat, and the bee pollen gives it a mysterious flavor that hints at fruit, dry hillsides, heat and late afternoons. It would be easy to eat way too much of this

Lots and lots of bee pollen!

Ingredients

2 cups heavy cream
2 cups whole milk
1 cup honey
1 T bee pollen
2 T warm water
1 t vanilla extract

Instructions

Heat milk to near boiling, turn off heat
Stir in honey to dissolve
Stir in cream and vanilla
Stir together pollen and water, crushing pollen until it mixes in
Add pollen mixture to milk/cream mixture
Chill at least 2 hours
Churn in ice cream maker until frozen
Place in containers and freeze at least 2 hours


Blackberry Sorbet

The berry sorbet is a perfect finish. It's color is a great contrast to the two pale recipes above, and the taste is generous and maybe a little sloppy, like a big wet kiss from a toddler.  


Ingredients:

1 cup water
1 1/4 cup sugar
1 quart blackberries
2 T lemon juice

Instructions

Heat water to a boil. Stir in sugar to dissolve, creating a sugar syrup.
Strain the berries to remove their seeds. You can either:

  • Strain through a food mill
  • Puree in a blender, then push through a seive
  • Strain through the fruit strainer attachment of a stand mixer
Add berry pulp to hot sugar syrup and bring just to a boil
Remove from heat, chill until very cold
Add lemon juice
Churn in ice cream freezer until frozen
Place in containers and freeze at least 2 hours


Naturally, we wouldn't want to bring anything to a party that we hadn't tried ourselves. Noah - waiting to get a sample. He declared the ice cream to be good.


Thursday, June 13, 2013

Glorious artichokes

We have our successes and our failures at Several Gardens Farm, and one epic success is artichokes.

me with a towering artichoke plant
Many vegetables with a long growing season also like heat. Tomatoes, peppers, pumpkins - none reach their full potential in Seattle, despite a long period between last spring frost and first fall frost. It's the rain and cloud cover, though this year has been gloriously sunny so far.

Artichokes are an exception for a couple of reasons. They can be grown as a perennial. This lets you start them very early or overwinter them, and they get off to a rapid start because they've got a great root system already in place when the growing season starts.

Also unlike most long season vegetables, artichokes are eaten as immature flower buds. If you think of growing artichokes as growing a massive and greedy flower, you will succeed.


You don't see this purple much in nature


Artichokes take about 10 square feet per plant, so you do need to plan for them in the garden. Again, treat them as an ornamental and put them somewhere where they can be appreciated.

They have great, textured silvery leaves all year in mild climates, and if you don't harvest all the chokes, the ones you leave behind will open into gorgeous purple flowers.


Each artichoke plant makes somewhere from three to a dozen chokes.

The first one is largest; when you cut it, it's followed by a set of smaller ones, and sometimes a third round that stays small and cute, perfect for marinated artichoke hearts.

If you don't harvest most of the chokes, the weight of the buds flowers will pull the whole plant over. So go ahead and eat them.

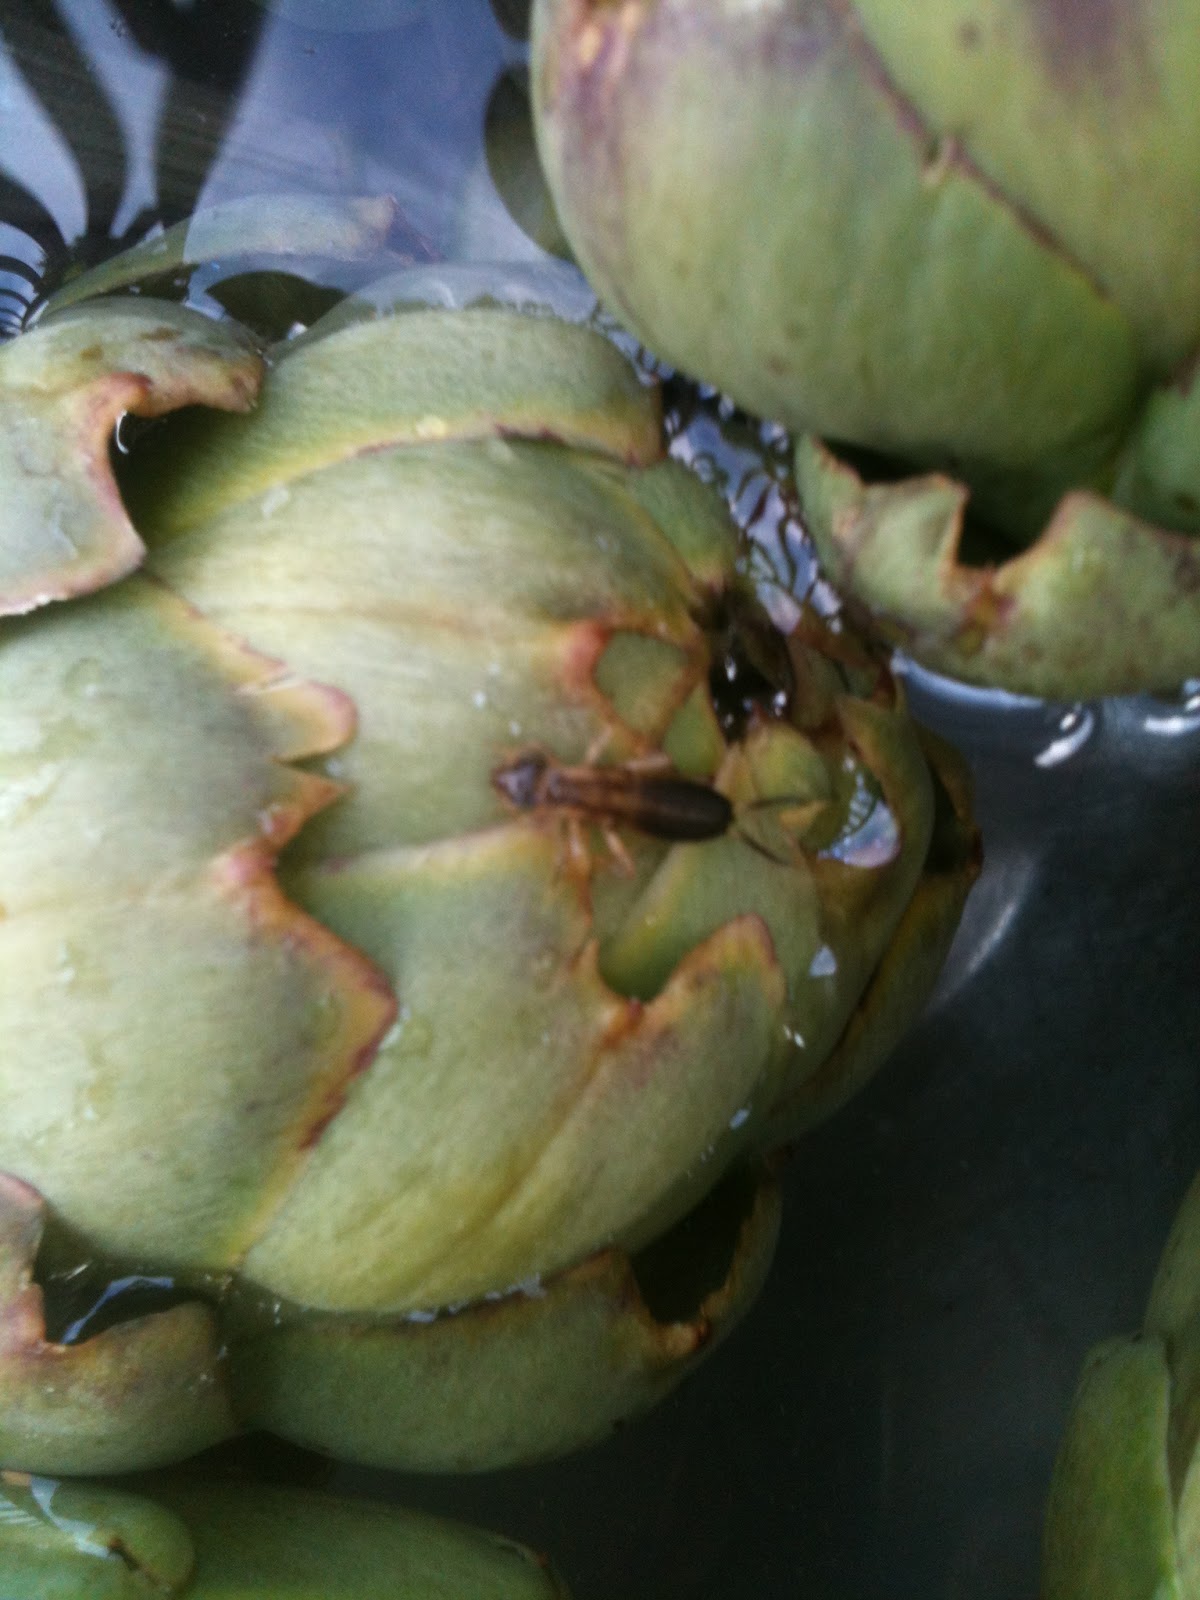
Actually, before you eat them, soak the freshly picked artichokes for twenty minutes in water to which you've added the juice of a lemon and a teaspoon of salt.


An earwig running out of an artichoke


As they soak, any bugs hiding between the leaves will climb out and seek refuge on top. You can either destroy them or (if you're a bug geek like me) return them to the yard.


After soaking the artichokes, you can boil them whole. This is nice for decadent eating with homemade mayonnaise. But honestly I find it tedious to eat them leaf by leaf, so I usually prep them first, keeping only the good part.

Prepare a bowl of cold water with the juice of a lemon, and save the lemon halves. You need something acidic to treat freshly cut or broken surfaces otherwise the artichoke will discolor.


Start breaking off leaves, trying to snap them off near the base but leave the edible bit at the bottom. Work your way around  the choke, occasionally stopping to rub the broken surfaces with the lemon halves.

When the yellow inner leaves are visible, you've hit the part where everything is edible.

Take a paring knife and cut away the tops of the leaves, leaving as much of the pale greenish yellow leaf as possible. In the middle, the whole leaf is tender and good.


 If you have very small artichokes you can eat everything in the center.

 Bigger ones have a nasty bit in the middle called the choke. You have to cut them in half and remove it.

I cut most of my artichokes in half anyway to make sure there are not bugs inside. If you are bothered by bugs in your food, this is a good time to let go of that. It's a small price to pay for eating organic artichokes grown at home.


Recipes:

Artichokes with mayonnaise or yogurt

(this recipe contains raw eggs. Due to concerns about salmonella or just the extreme amount of oil you may choose the alternate sauce option)

Ingredients

1 large or 2 small artichokes per person

Option 1
1 fresh egg
1 cup neutral flavored oil
1/4 cup nice extra virgin olive oil
1 small clove garlic
1/4 t salt
1/2 t mustard
2 T lemon juice, or to taste

Option 2
1 cup Greek yogurt
2 T extra virgin olive oil
1/4 t salt
1 small clove garlic

Instructions

Place artichokes in a large pot and cover with cold water. Heat to boiling on medium heat, them simmer 40 minutes or until a leaf pulls out easily.

Meanwhile, make the sauce. For mayonnaise, crush the garlic and the salt together and place in a bowl.

Add mustard and egg, and stir to combine.

Place the neutral oil in a pitcher with a pouring spout. Stirring constantly, add the oil a bit at a time in a stream. It should immediately disappear into the mixture. Pause from time to time and stir to make sure it's all combined.

Once all the neutral oil is added, stir in the olive oil. Then add the lemon, and check for flavor. Refrigerate after mixing.

For yogurt sauce, crush together the garlic and salt. Place in a bowl and stir in all the other ingredients.

When the artichokes are ready, drain them. Turn them pointy side down and let them steam and drain for ten minutes or they will be soggy. This also lets them cool down, since they are finger food.

Place artichokes on the plates of each diner, and pass the sauce. Make sure you have a bowl or bowls for the inedible part of the leaves. Pull the leaves out of the choke one by one. Dip the bottom of each leaf into the sauce, and with your teeth scrape the sauce and the edible portion of the leaf into your eagerly waiting mouth. Yum.

This recipe will serve up to ten. The limit is how big a pot you have. But as you cook more artichokes, they will take longer to come to the boil, so plan accordingly. The sauce is rich and should be eaten in moderation.

Roasted Artichokes

Ingredients:

8 small artichokes, trimmed and cut in half as above
2 lemons
1/2 t salt
2 t olive oil
1 clove garlic

Instructions:

Squeeze lemon juice into a bowl of cold water. Soak artichokes for 20 minutes. This will reduce any bitterness, which is a problem with some artichokes.

Preheat oven to 425

Chop garlic.

Drain artichokes and toss with salt, oil and garlic

Spread artichokes on a cookie sheet or pan. There should be room between them

Roast ten to fifteen minutes until golden underneath. Flip them over and roast another ten minutes.

Serve immediately, with lemon wedges to squeeze over.

Serves 4 as part of an appetizer plate or I can eat them all myself. This dish actually works for most vegetables.

Marinated artichoke hearts

Ingredients:

8 Artichokes, pared and halved 
1/2 t salt
3 T olive oil
1 t fine vinegar (you will taste it, you should like the taste)
Juice of 2 lemons, plus the cut halves of one of the lemons
1 small garlic clove, crushed
Seasonings of your choice, such as tarragon, coriander seeds, or fennel
6 black peppercorns

Directions:

Place the artichokes in a pot of water to cover, and add the juice of one lemon. Throw in both lemon halves too.

Bring to a boil then simmer just till tender when pierced with a sharp knife tip

Drain

While still hot, toss with all the other ingredients.

Refrigerate. Let rest 24 hours before serving. However these are meant to serve, not to keep indefinitely.

Besides they're delicious and shouldn't be horded, but rather enjoyed.


a
Shared on: homestead-barn-hop-115

Saturday, June 1, 2013

Lawn to garden conversion - a big mess

The garden as I imagine it
In past postings I've started to outline our ambitious plans for turning the front yard into a meandering hillside of fruit trees and trellised vines.

In my mind, it would be Xanadu, with sunny pleasure domes and sinuous rills and so forth.

My medium term vision was less grandiose but still ambitious. I envisioned 3000 square feet of worm farms.


The yard is a long hill, which we have turned into three long terraced rows with raised walls of cut sod on the downhill side.


We wanted to fill the area uphill of the sod walls with good soil, made by worms.


Grow yummy food


Rows of shredded paper judiciously mixed with food waste and inoculated with red wigglers would break down into crumbly, fluffy, dynamic, live soil that would nourish plums, cherries, flowers, and the body and soul of all who live here.


I dream of reaching out the kitchen window to pick a bucket full of ripe Italian plums.


Reality is a little different right now. 
I have turned our front yard into a pile of garbage.


Worms need several components to thrive. First, they need bedding. This must be something that resist compacting, lets the worms crawl around, and holds moisture even in the dry summer. Our first plan was to scavenge shredded paper, but we have a surprisingly hard time finding enough.

Companies that shred large numbers of documents have confidentiality issues and cannot give the paper to anyone. Bags of paper from individual simply weren't enough.

So we added shredded cardboard. A bale of it - close to a ton.


Once the cardboard was distributed, the place looked like a dump.


It had taken the better part of a day to spread it out, but I knew we had to get it covered before a wind blew through.

Shredded cardboard is heavier than shredded paper, but it's by no means going to stay put without some effort on our part.


Endless seas of trashy cardboard


So - on with the burlap bags.

Next I pulled out the soaker hose and wetted down the whole mess. It helped the cardboard settle in so it is less likely to get blown around.
More fun way of watering


Next I added food waste. Worms nibble at their bedding, but it's not really food for them. They eat the same things we do - only they are content with the parts of our food that we consider inedible - stalks, cores, bruised and moldy pieces. Worms only ask that their food remain moist but not wet.

I started out modestly with our kitchen scraps. Then a buddy of David's, who owns a juice bar, gave us six garbage bags of vegetable pulp, and I got twenty gallons of spent coffee grounds.


                                                                                                                                                                       I spread it all out over one section of the cardboard, forming a layer 1" deep. I mixed it all up. Then I transferred the entire content of two worm bins - about 100 pounds of combined worms, worm cocoons, and worm castings, on top of the mixture. Over that I sprinkled two bags of shredded paper, then pulled on the burlap again.

Three weeks later, I went to check. The worms had made no progress whatever. They huddled near the original places where I had set them. They had an earthy, worm poopy smell.

The coffee grounds had formed dense, granular clumps. The juicer waste had degraded into slimy, smelly, impenetrable paste that gobbed and glued onto the cardboard. That stuff smelled really bad.


I tossed in more shredded paper and fluffed everything up as well as I could.

This is my garden glove after mixing the food waste with the paper shreds. The gluey vegetable matter literally pasted the paper shreds on to the glove.


And back on went the burlap.


Then I went into the house and hid my head under a blanket while rocking back and forth. Figuratively anyway. Really, I took a long shower.

What have I done?

I got rid of a perfectly good lawn for this?

Because I saw some documentary on how organic farmers in Cuba have these gorgeous worm farms that are restoring soil tilth, I had the overweening pride to think I was going to do the same?!? How dumb can I be?

I am faced with the choice of either removing the mess and putting in new grass seed, or slogging forward with my experiment.


You can probably guess which. I can never walk away from an experiment.

Several Gardens Farm will persevere. I know the power of worms to turn things into soil. I have been keeping a worm bin for years.

I need to have faith in these little, segmented, soft bodied creatures to do their job.

As long as I can keep them covered, keep them smelling OK and keep the neighbors placated, this project will continue.