Friday, November 30, 2012

Traditional curd mozzarella

As part of the cheesepalooza challenge, I am working my way though Artisan Cheesemaking At Home by Mary Karlin, with a blog description of at least one cheese from each chapter. I'm excited to try new cheeses, and to go back and self correct with varieties I've tried in the past and had poor success with. But I have to admit I was a bit reluctant with the Mozzarella.

Like most cheese makers, I have made Ricki Carroll's 30 minute mozzarella from my much beaten up volume of Home Cheesemaking. In fact, I may owe a bit of my belly fat to this recipe. It's so easy. Instead of acidifying the milk with a bacterial culture, which takes a good deal of time, you use citric acid, and "KAPOW" the milk is ready to turn into cheese.  It's so rewarding, and the finished, stretchy cheese is radically different from milk. You get a real sense of process in a compressed time.

On the down side, though, the thirty minute cheese is a bit on the overly stretchy side for me, and lacks some of the flavor notes you get from culturing milk. I like a very tender, sour tasting, delicate mozzarella, and, nudged by being in a challenge, I was finally willing to invest the significant amount of time needed to make it the old fashioned way.

Because although this cheese only takes one day to make, it does take most of that day. It's similar to pet sitting a puppy - you don't need to be there all the time, but if you neglect it at crucial times you will be sorry. So this is not a cheese to make with your high school best friend, who is only in town for one day, and wants to get pedicures in the morning and see Anna Karenina in the afternoon and then make something home made for dinner. It's not a good cheese to make with the Webelos den who can't braid a piece of string without getting in a fight. This cheese it takes anywhere from 7 to 16 hours to make, and requires attention intermittently throughout.

Recipe:


1 gallon milk
1/4 t thermo b starter culture
1/4 t calcium chloride diluted in 1/4 c dechlorinated water
3/4 t rennet in 1/4 c dechlorinated water
kosher salt
Cheese cloth
pH paper

Heat milk to 95 F (35 C) gently over 20 minutes. You will hold the milk at this temperature for the next two hours, so place the pot of milk in a sink full of warm water or devise some other water bath setup.

Add starter, mix well with a whisk for 20 strokes. Cover and ripen 45 minutes

Add calcium chloride, whisk in as above. Wait ten minutes, then whisk in rennet as above. Cover and leave for 1 hour, at which point it will be solidified curds in clear whey

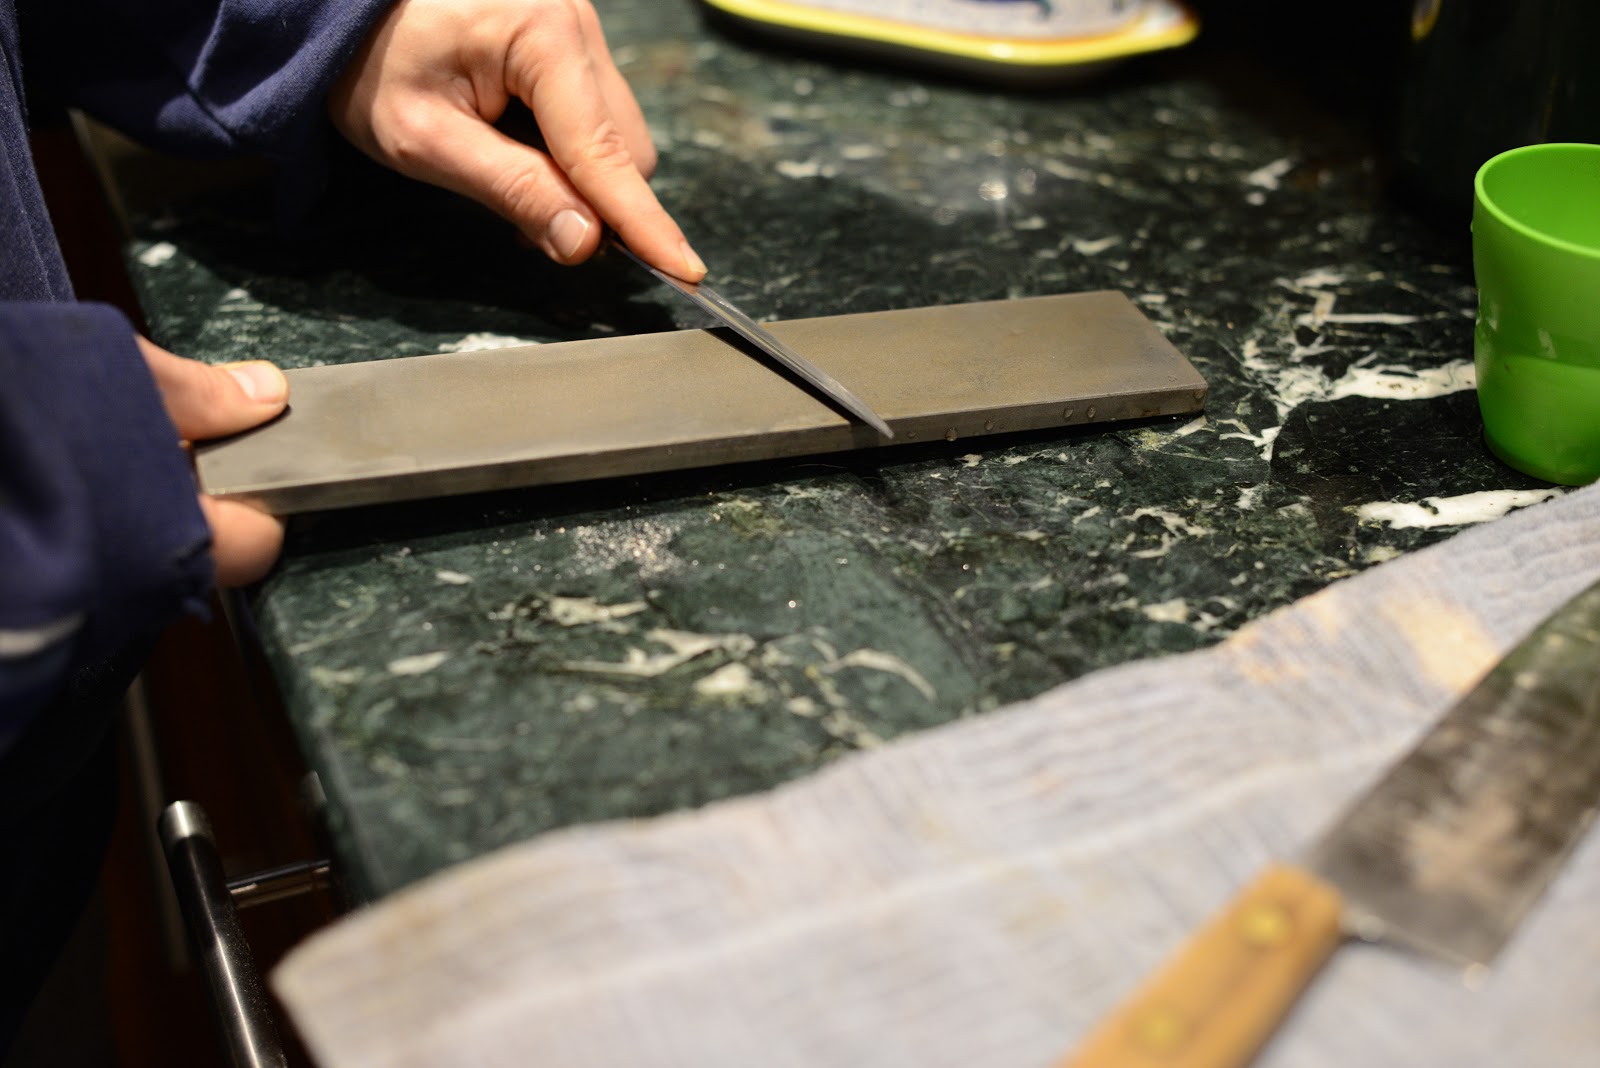
Cut  curds into 1/2" cubes, cutting first one way, then at 90 degrees to form squares, then angling the knife to reach the bottom of the pan, creating slanted diamond like cube thingies. Leave undisturbed for 30 minutes, during which time more whey will separate from the curds.

Gently raise the heat, so that the temperature goes up to 105 F (42 C) over a thirty minute period. Stir/agitate the cubes gently as you heat. Continue to gently stir/agitate for ten more minutes, then let the curds settle to the bottom of the pot for 30 minutes. They will start to clump together, and continue to do so in the next steps.

Dampen cheesecloth in the whey, and use it to line a colander. Place a pot under the colander to catch the whey, and pour the curds and whey into the colander. The curds will drain for the next fifteen minutes. Then transfer them back to the pot they were in.

Let the curds sit in the pot for the next 2 hours, turning occasionally. Keep them warm. They will lose a bit more whey, that's OK. They will form a blob, also fine.

At the 2 hour mark, test the pH. If it is above 5.2, wait 15 minutes and check again. Repeat as needed until it gets to 5.2 or below. This is the part where you just need to go with it. If you don't wait, the cheese won't be stretchy, and if you wait too long it will be like hideous white milky sour bubble gum. Just right, and you will have tender, malleable mozzarella.

Once you hit that sweet spot, reserve one quart of whey and heat the rest of the whey and 1 quart water on the stove to 170 - 180 F (around 80 C), which is TOO HOT TO PUT YOUR HANDS INTO. Just trust me on this.

Cut the curd mass into 1" cubes, and place them, or some of them, in a stainless steel bowl. Pour on the hot whey - carefully. Use a rubber spatula to work with the cubes in the hot liquid, moving them around to form a ball. Now put on clean rubber gloves, and lift the ball out in your hands. Stretch it into a rope, and double it back on itself. This part should be worth everything that went before!!!

You can return it to the hot whey if it starts to tense up on you. Stretch and fold it a couple of times, to give it texture and shape. Then quite because you will make it rubbery if you work it too much.

Shape it into balls, and place them in a bowl of ice water.

Make a brine of 3 quarts whey and 9 oz salt and cool it in an ice bath. Place the cooled cheese in this brine for 8 hours, turning the cheese occasionally. Remove from the brine and serve or store covered in water to which you add a small pinch of citric acid.

How the cheese turned out:

This cheese failed.
A bowl full of failure


Instead of the tender, chewy, dreamy cheese I visualized, it broke apart into grainy morsels when I heated it. I double checked my pH - it was right at 5 with both testing strips, two different brands that both worked accurately on other substances.

I let the curds acidify another fifteen minutes and tried again, but results were the same.At that point the pH was below 4.9, and the curds tasted like sour yogurt.

I was using goats' milk, from my own goat who is in her 9th month of lactation. This would probably qualify as late lactation milk an may have been the problem. I know stage of lactation can change the cheesemaking process.

I was seized by a deep sense of discouragement, went to the hardware store and impulse shopped 25 feet of 1/4" soaker hose. When I got home, the kitchen smelled like hot whey and sour milk. I cleaned up and sat down to write.

Not really where my cheese ended up, just a reflection of my attitude toward it
I thought about skipping this post, but then I thought that great minds must not fear failure, they must learn to see it as experience, or experiment, depending on their goals. Would something like this stop Marie Curie? Mais non! I will publish my results, whether I got an acceptable cheese or not.

If nothing else, at least it won't end up in the trash. The hens never think I make mistakes. Sour curd is as good as any other in their book.


Shared on: Cheesepalooza


Sunday, November 25, 2012

A Greener Black Friday

As much as I don't want to, I have the desires of a consumer. I love shoes, hats, gloves and outfits. I'm a sucker for cool gadgets that do my housework for me. When I think about helping the environment, my mind spontaneously jumps to solutions that involve new stuff - solar panels, hybrid cars, low watt light bulbs. But while these things have their place, I believe that consuming got us into the environmental catastrophe we live with. I deeply distrust environmental solutions that involve buying our way out.

The day after Thanksgiving was a good day to start a road to buying less.  Black Friday, the biggest shopping day of the year, feels like a social event. We go out shopping as a community, to be around other people - it's bright, loud, fun and distracting.

I wanted to recreate that feeling of bustling activity, but in a more intentional way, focusing on taking care of what we already have instead of buying more things. The word stewardship seems to fit what I was looking for; a relationship with the world in which we strive to preserve the good things entrusted to us, instead of burning through them as fast as we can.


So this year, we celebrated Green Friday. I invited friends over for a mending and fixing party.

I had no idea how this would turn out. It had the potential to be either a hoot, or a serious failure.

Here I am, issuing an invitation to come sew on buttons, winterize rakes and shovels, sharpen knives, and generally do things we all put off because they are so unmotivating.

And to top it off, the invitation read "potluck - bring leftovers"

It took chutzpah to ask for this, but it paid off.

My younger brother selected the job of seasoning cast iron.

He took our crusty, rusty pans and scoured them with steel wool and green scrubbies.

Then he dried them well, heated them on a hot burner, and oiled them heavily.


There was a little smoke, and the smell of burning oil and hot metal.


And then the pan became glossy, black and clean.


A cast iron pan is like a phoenix, renewing itself by plunging into the fire.

 I knew this once, and seeing my brother clean this pan reminded me.


Thanksgiving week means rain in Seattle, and this year was no exception. I don't know what I was thinking, including garden tool restoration on the chore list.

This involves sanding the entire tool, wood and metal, wiping it clean with a dry rag, which soon becomes filthy with rust, and then covering the whole tool with several coats of linseed oil.

There is abundant red dust, and the oil smell is strongly fishy, not to by tried indoors. One spill and the house is marked.


Our amazing neighbors Corey and JJ asked to learn with our tools. They settled onto a bench out in the barn, and cleaned.

I felt  inhospitable for placing them out in the hay with the animals, and having them clean my stuff.  But they cleaned everything, then went home to start on their own tools. Eventually they were joined by other hardy souls lured out by the ever adorable ducks.


Madeline brought a troublesome knitting pattern she had been putting off trying.

Her goal was to use up all the odd bits of yarn, in one big, motley garment.
Cilla graded papers. This is her first year teaching ninth grade English. She is a scholar and a wise woman. But teaching kids who don't know or want to know the subject is really stretching her as a person.
Alas, there are no pictures of Nik making chain mail. This was a  surprisingly delicate job. He hooked together thousands of tiny metal links to form a fluid, comfortable looking metal mesh. It looked more like jewelry making than armor production. Nik started his project with ten thousand metal loops, and said he would need more. He should be busy for a while with this.

Meanwhile several kids sorted Pokemon cards. It may not seem like drudgery, but they had been putting this off, letting their cards get disorganized, and then wanting to buy more. Organizing helps them realize how many toys they already have, and appreciate them more. Possibly some trades were also negotiated.


But most people came to sharpen knives.
We already knew that many people put off knife sharpening. They either fear getting it wrong,  or  view it as something their dad did, but that contemporary humans are no longer able to - a lost art. 

This is very sad. A sharp knife is as much of a pleasure and as useful of a tool now as it ever has been. Sharpening a knife is a great place to start relearning those supposedly lost skills.

We use two stones - one coarse, one fine, and a leather strap. Party goers learned to grind the blade at an angle against the stones, rubbing away the blunt edge and creating a beveled surface so thin and sharp that a hair dropped on the blade is cut in half. 


It's always better to use a sharp knife.  It will put a smile on your face!


 Maya and Gary brought a mixer that needed new grease. This intimidated me. If they came to the party with a working mixer and left with a broken one, no positive event could turn the party around for me.

But it didn't intimidate Maya, Gary and David.

They had the lid off, the gears out, and new grease in place while I was finding a cinnamon stick to put in the cider.


 Some people buy fancy appliances and let them sit in the kitchen unused. Maya uses this mixer daily. She has used virtually every attachment. She doesn't think of it as a disposable item, and she didn't want it to be a mystery. She wanted real ownership - real understanding.

 We wanted that for our oven, too, but it didn't happen, at least not yet.

One burner is having ignitor problems. We thought - how cool would it be if we could fix it during a fixing party.

We didn't quite get it working again, but we will keep trying.


Overall, Green Friday was an outstanding success. People had fun while fixing things, and gaining a new appreciation and gratitude for the items they already have.

We will almost certainly do Green Friday again next year. I challenge others to try it too; I think you will enjoy it. It's a great way to share and teach skills, be with friends, and become better stewards.


Friday, November 9, 2012

A deciding moment for green tomatoes

 The last few nights, the the weather forecast is for near freezing, and pockets of the neighborhood are white with frost. Soon it will be curtains for all the tender annuals.

Like many tomato growers, I like the basil/tomato combination from a culinary perspective, but there's an additional reason to grow basil near your tomatoes.

Basil is even more tender than tomatoes.The leaves start to drop weeks before the tomatoes are harmed by the cold.

When the leaves near the top start to turn brown, or the stems look hideous like the one to the right, I know it will soon be cold enough to bring in the last of the green tomatoes.


Here is what a tomato plant looks like when it is first touched by a hint of frost, but hasn't gotten cold enough to succumb. The leaves are curling, the fruit start to go translucent. After a real frost, the fruit will freeze, and when it thaws its a mushy, blackening mess.  Before that happens, it's time to bring in all the usable tomatoes, ripe or not.

Tomatoes - just tickled by frost. The one to the right is further inside the greenhouse, and was unharmed


As I pick the tomatoes, I practice triage. Some of the tomato plants have gone crazy with the recent rain, sucking up so much water that their fruit is badly cracked. 

Slugs and earwigs immediately move in, and the fruit is inedible. To humans, anyway. The chickens love them. Who else gets excited to have rotten tomatoes thrown at them?

Here Aurora stands guard over a bunch of the juiciest of the lot, keeping the ducks and the lower ranking hens at bay.


The remaining tomatoes are of all sizes and degrees of ripeness. I try to pick tomatoes gently, and not pile them up. They are fragile.


I sorted the tomatoes. 


Those with cracked skin, minor blemishes, or very wide stem ends (like the red tomato at the top) will not store well. They are too attractive to fungus and fruitflies.

Very green ones, or ones that have not reached full size, are unlikely to ripen. They work for green tomato recipes (fried, chutney, pickles, salsa) but I won't try to store them.

As Shakespeare says "ripeness is all".  I think that over and over to myself as I harvest, and it makes me sad. It's not an inherently sad phrase - it's what you make of it. But right now, I think about being harvested too soon, or being past one's prime.

Fall is that kind of season. I try instead to think "season of mists and mellow fruitfulness". That sounds much better.

The remaining tomatoes, the best of the best, are set aside to ripen. I wipe off any dirt, make sure their skins are intact and blemish-free, and set them one tomato deep in boxes lined with newspaper. This way, if one tomato does start to spoil, the paper will protect the ones around it. I organize them so they are together with tomatoes of similar ripeness. 

Tomatoes don't belong in the fridge. They need a moderate temperature in the fifties or sixties. We in Seattle think of that as room temperature. I store mine in the basement just to get the out of the way. I check on them every week or so - more often if I need tomatoes. The big red tomato in the center of the picture will be ripe almost immediately. And because it has such a deep dimple in its blossom end, it will probably start to go bad soon after. I make a mental note to use it soon.


I make the real greenies and a few of the redder ones into green tomato salsa. It's tangy and sour when it's first made, but mellows over a few days and is delicious with corn tortillas and goat cheese.

Recipe

1.5  kilos green tomatoes (a little over 2 pounds)
1 very large red onion
4 cloves garlic
4 jalapenos or to taste
1 t salt
2 t cumin
Cilantro to taste (I think 2 T is standard, but I like about 1/2 C)
1 C vinegar or lime juice

Cube the tomatoes and onion into small dice. Crush and chop the garlic. Carefully (rubber gloves recommended) seed and chop the jalapenos. 

Place all ingredients in a large saucepan. Bring to a boil and cook for ten minutes at a gentle boil. 

Cool slightly and process in a food processor if desired. Processing makes a better sauce for dipping tortillas. 

Recipe for Green Tomato Pickles

This isn't really a recipe, but it's a great idea my friend Portia taught me.

Eat a jar of your favorite kind of pickles. Save the juice.

Cut green tomatoes into quarters and put them in the juice.

Refrigerate and serve after a week or so. They are really yummy.

Friday, November 2, 2012

Purple Potato Bread

I have gotten in a bit of a bread making rut lately. I bake a mean loaf of crusty, tangy, mostly whole grain bread in a free form boule shape, and it's very good. But sometimes I get bored.

I used to make a potato bread that was notable for being tender, quick, and rich tasting with a deceptively simple recipe. I had gotten out of the habit, because of the extra step of boiling up potatoes. Looking at the haul of purple potatoes from our garden, an idea begins.
Purple potato patch, summer 2012

Just over 675 grams


I tell my kid I want to make purple bread out of our potatoes. He says this would be awesome. I mention the real possibility we will end up with grey bread instead.

 He says "that's OK. It will still taste good". The bitter sweetness of a child becoming mature.

The recipe:

1 1/2 pounds (700 grams) of potatoes, scrubbed
4 cups flour (or a little more)
1 1/2 t salt
2 T olive oil
4 t baking yeast
1/4 cup lukewarm water
A handful of cornmeal


Place potatoes in a pot with cold water to cover. Bring to a boil and then simmer until a knife inserted in meets little resistance, about 20 minutes depending on the size of the potatoes. Drain, and return to hot pan to steam. A cut open potato shows a dark purple center and a very pale band around the skin.
Boiled and cut open


 Mash potatoes with olive oil and salt. Let them cool to lukewarm. At this point my purple potatoes were an amethyst color, with tatters of dark skin throughout. Because they were mashed without added liquid, they didn't get fluffy and creamy. They were just crumbled up.

Mashed purple potatoes
Mix yeast and water to dissolve.

In a stand mixer, with mixing paddle, combine potato mixture with yeast, and add 3 cups of flour. Set mixer on low and mix to combine.

Change to dough hook and add the remaining flour. The dough will be weird. It starts out as a shaggy mess, and then as the water in the potatoes gradually combines with the flour, it will form a heavy, soft dough. At this point it's clear the bread will be a soft shade of purple at best. All the vibrancy of the potatoes is merged with the pale flour.


Mix on low for 8 minutes, until a soft dough forms. Even after eight minutes, my dough was still not uniform, but rather a very light colored background with flecks of different purples scattered about.

Let the dough rise until doubled in size, one to two hours.


Dough with flecks of purple


Once the dough is doubled in size, gently deflate it by pressing it down. Break or pull it into two equal sized pieces, and knead them briefly and gently. I kneaded too much and started losing flecks of potato. A few moments should be enough.

Shape each half of the dough by stretching it slightly and then tucking the outside edges in so they all meet in the center, forming a ball. Pinch the seams together, then roll the ball between you hands to slightly elongate it. I found the dough to be a bit strange. It felt like children's play dough, and was perhaps the least sticky dough I have ever worked with. I barely had to wash my hands after shaping it.

Shaped loaves

Set each loaf on a sheet of parchment paper, and cover with a damp kitchen towel. Set them in the warmest part of the kitchen to rise for 45 minutes or until doubled in size.  

When the loaves have been rising for 15 minutes, place an oven stone, a cast iron griddle with the smooth side up, or an inverted cookie sheet on the middle rack of the oven, and preheat to 450 degrees.

Once the loaves are doubled in size, remove the towel. Sprinkle the baking stone with a bit of cornmeal and gently life one loaf at a time from the parchment paper. Set it down, upside-down, on the stone or sheet in the oven. Bake for 30 minutes, then check the loaves. If they are deep golden brown and sound hollow when you tap their underside, they are done. If they are pale or sound solid, put them back for another fifteen minutes. 

Not grey. But not really purple either

I could tell from the golden exterior of the bread that it wasn't dark enough to be truly purple inside. What I got was a pale lavender bread, flecked with darker purple and maroon. 

The texture was velvety, tender and dense. I tasted olive oil, and just barely a hint of the potato, but I wouldn't call this a potato dominated bread. 

The main flavors were yeast, toasted grain, and a slight sweetness, although no sweeteners were used. This bread would make great cinnamon rolls with a bit of brown sugar added to the dough.

It's also pretty good just the way it is. 
Shared on little house in the suburbs , farm girl blog fest