Friday, December 21, 2012

A tale of two boots

In Seattle's rainy December it's easy to forget that I ever felt sun on my face. The nights are long, the sun low in the southern sky during its brief visits, even at noon. At least some part of nearly every day, we get rain, sleet or falling slush.

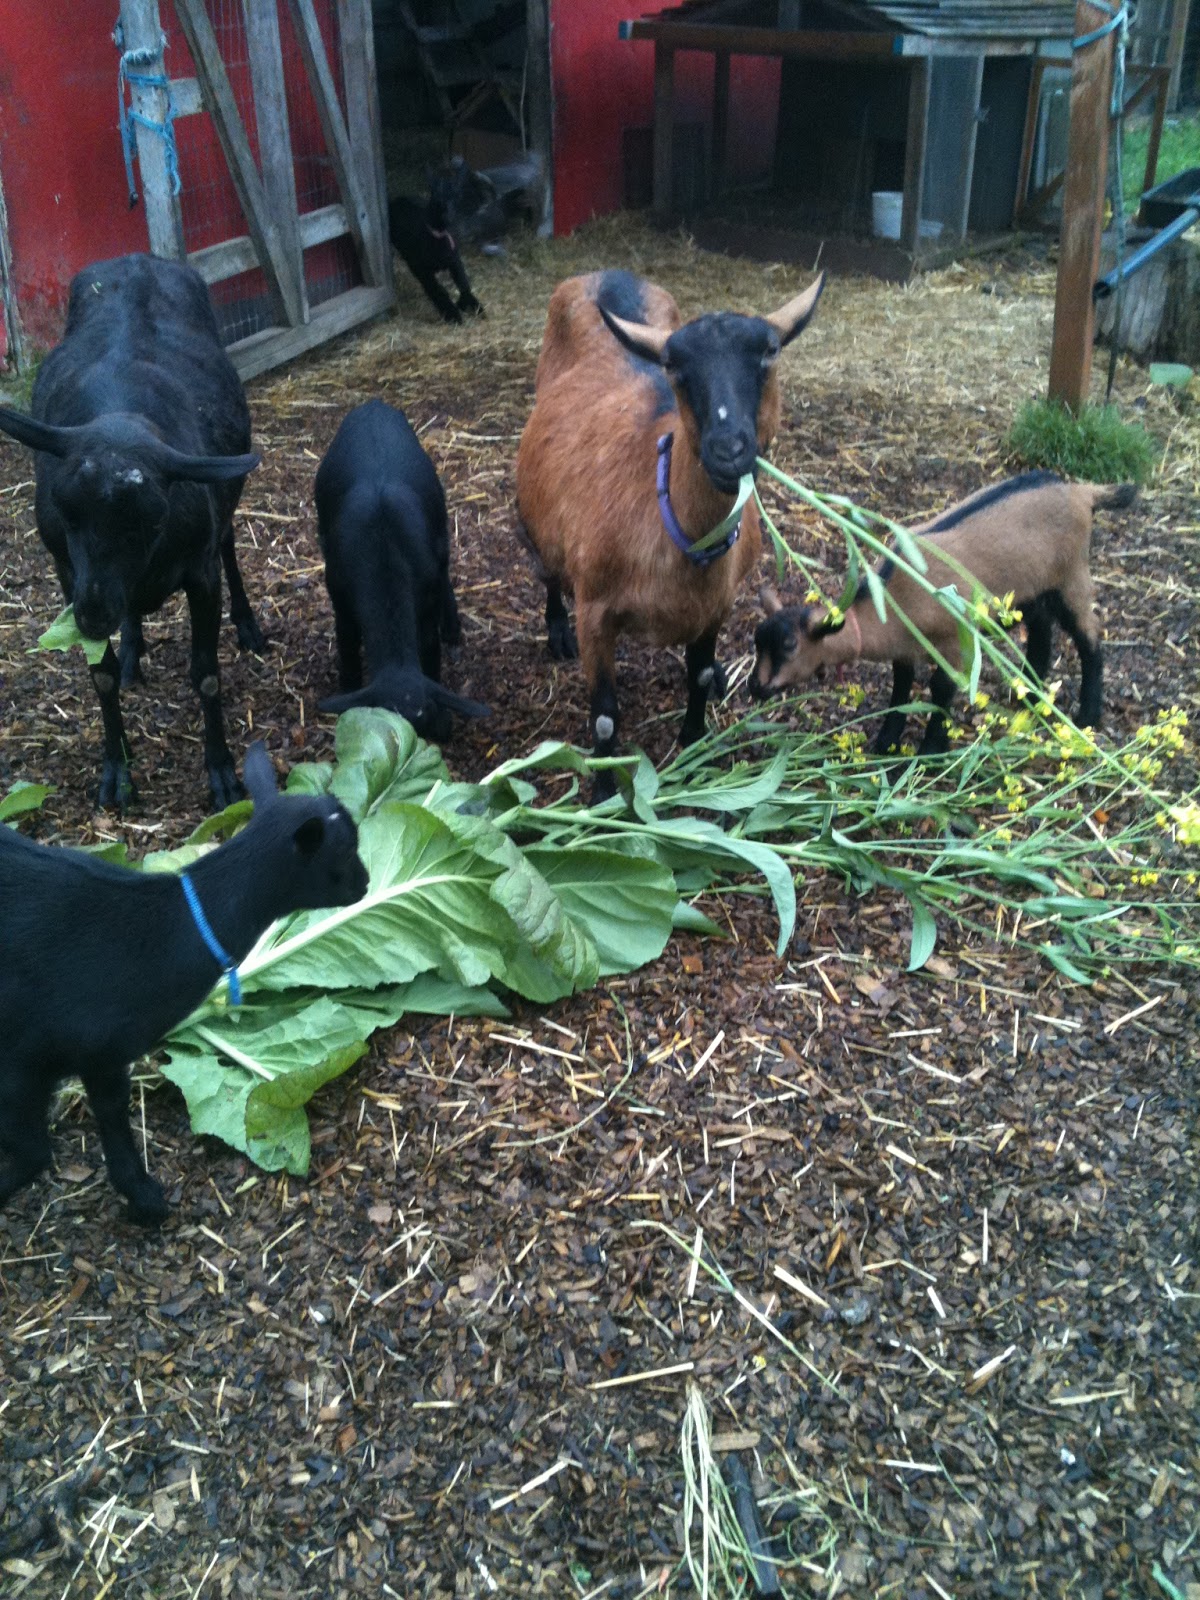
The goats and the chickens feel about as excited as I do. Lightning is afraid of the dark, Jeannette  sleeps the day away. Meggie is stoical, as she so often is. The chickens find dry spots and just hunker down in them, occasionally foraging for the abundant worms that rise up out of the saturated ground.

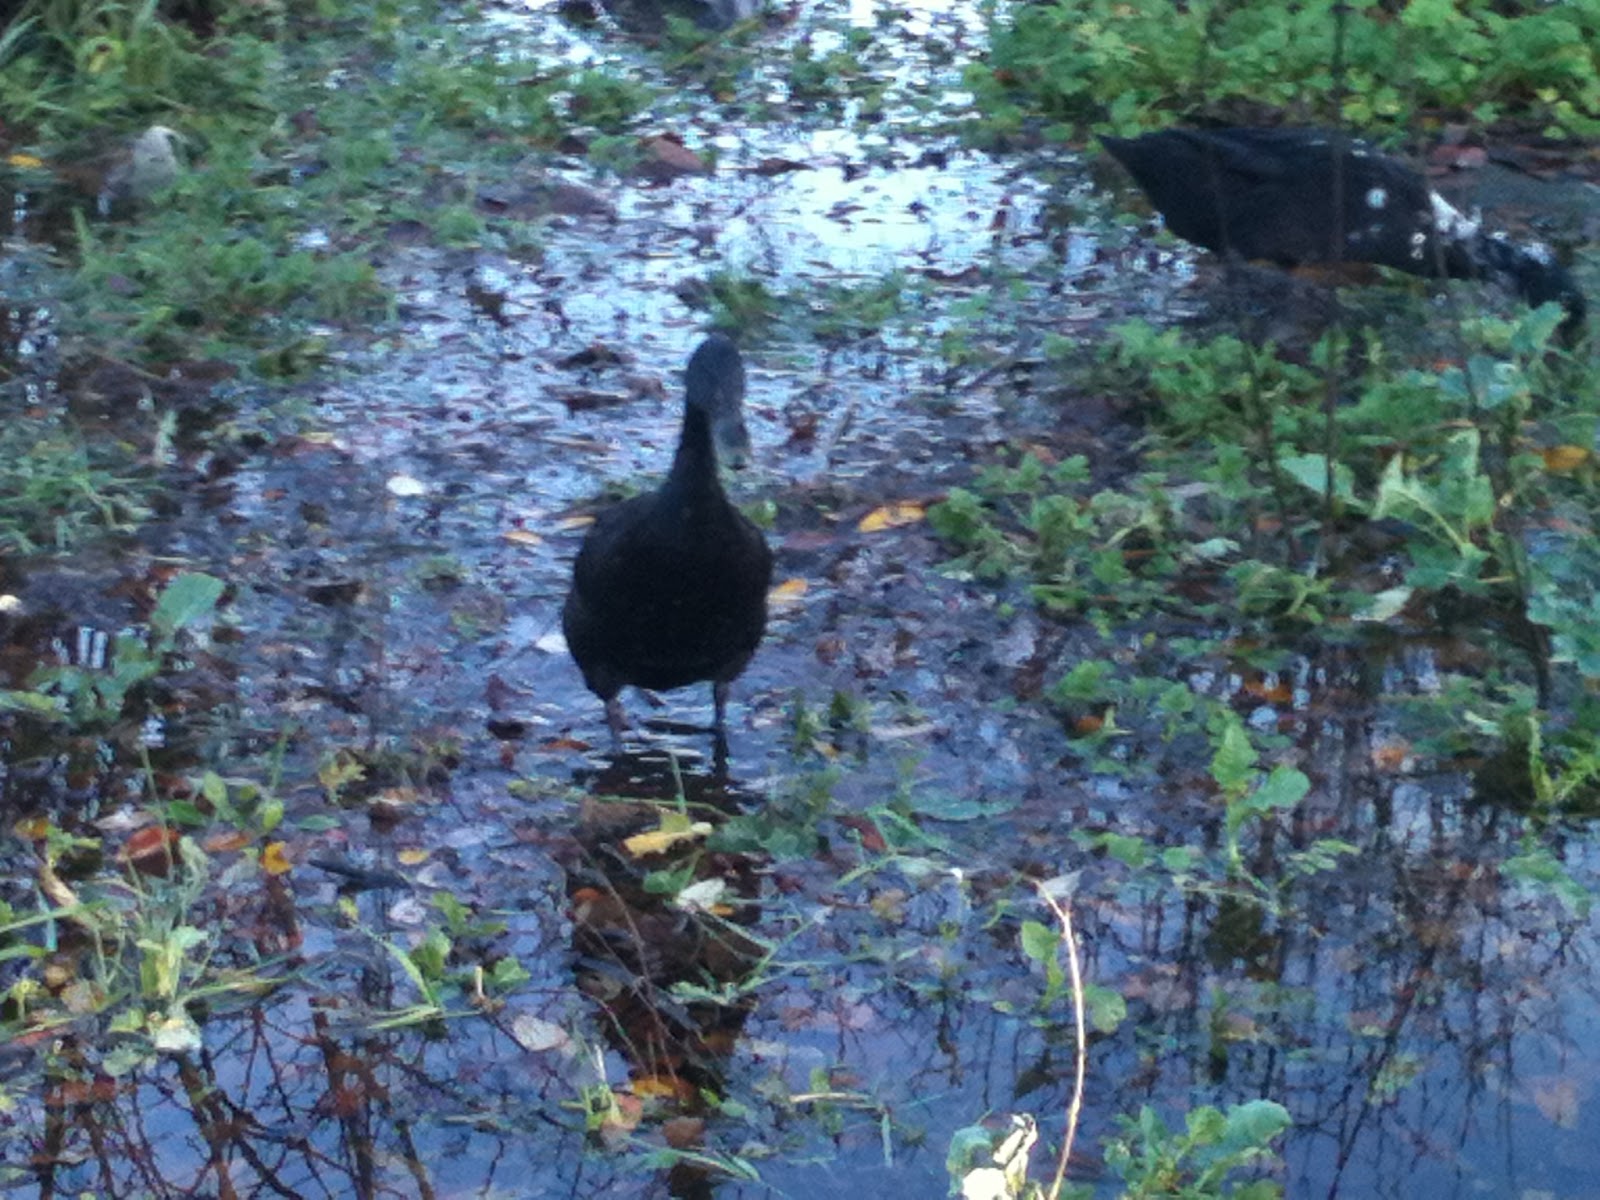
The ducks, bless them, love this weather. 


They live for water, and their coats resist all attempts to dampen or chill. The back of the yard is under water.


Areas are barely submerged and swampy, others deep enough for them to swim around. They dabble about, fishing up sluggies and worms and unfortunate beetles that didn't get out before the rains. 

One night, they refused to come in. Maybe they would have been safe. Most predators would be less skilled in the water than they are, but I've lost ducks to raccoons before and I was taking no chances. Out I ran, boots sinking in the muck, to round them up.


By the time I got them all to bed, my feet were encased in big gray rubber bags of wet.

I drained my boots, blotted them out with a towel, set them in the mudroom and went to bed. Predictably, the next day they were as damp as ever.

I have a very good rapport with a wide circle of facebook friends. When my boots get wet, I tell people, and they make suggestions. There were two main schools of thought:


  1. Stuff dry, crumpled newspaper into the boots to absorb the water
  2. Let air circulate through the boots - doing nothing to obstruct the rapid flow of moist air out

People did not agree which method was better, and speculated at length. Both groups agreed I should do an experiment to see who was right.

My Experiment:

I filled both boots to the tops with water. I left them for ten minutes, to fully saturate any crevices. Then I held each boot by the heel and drained it for five minutes. 
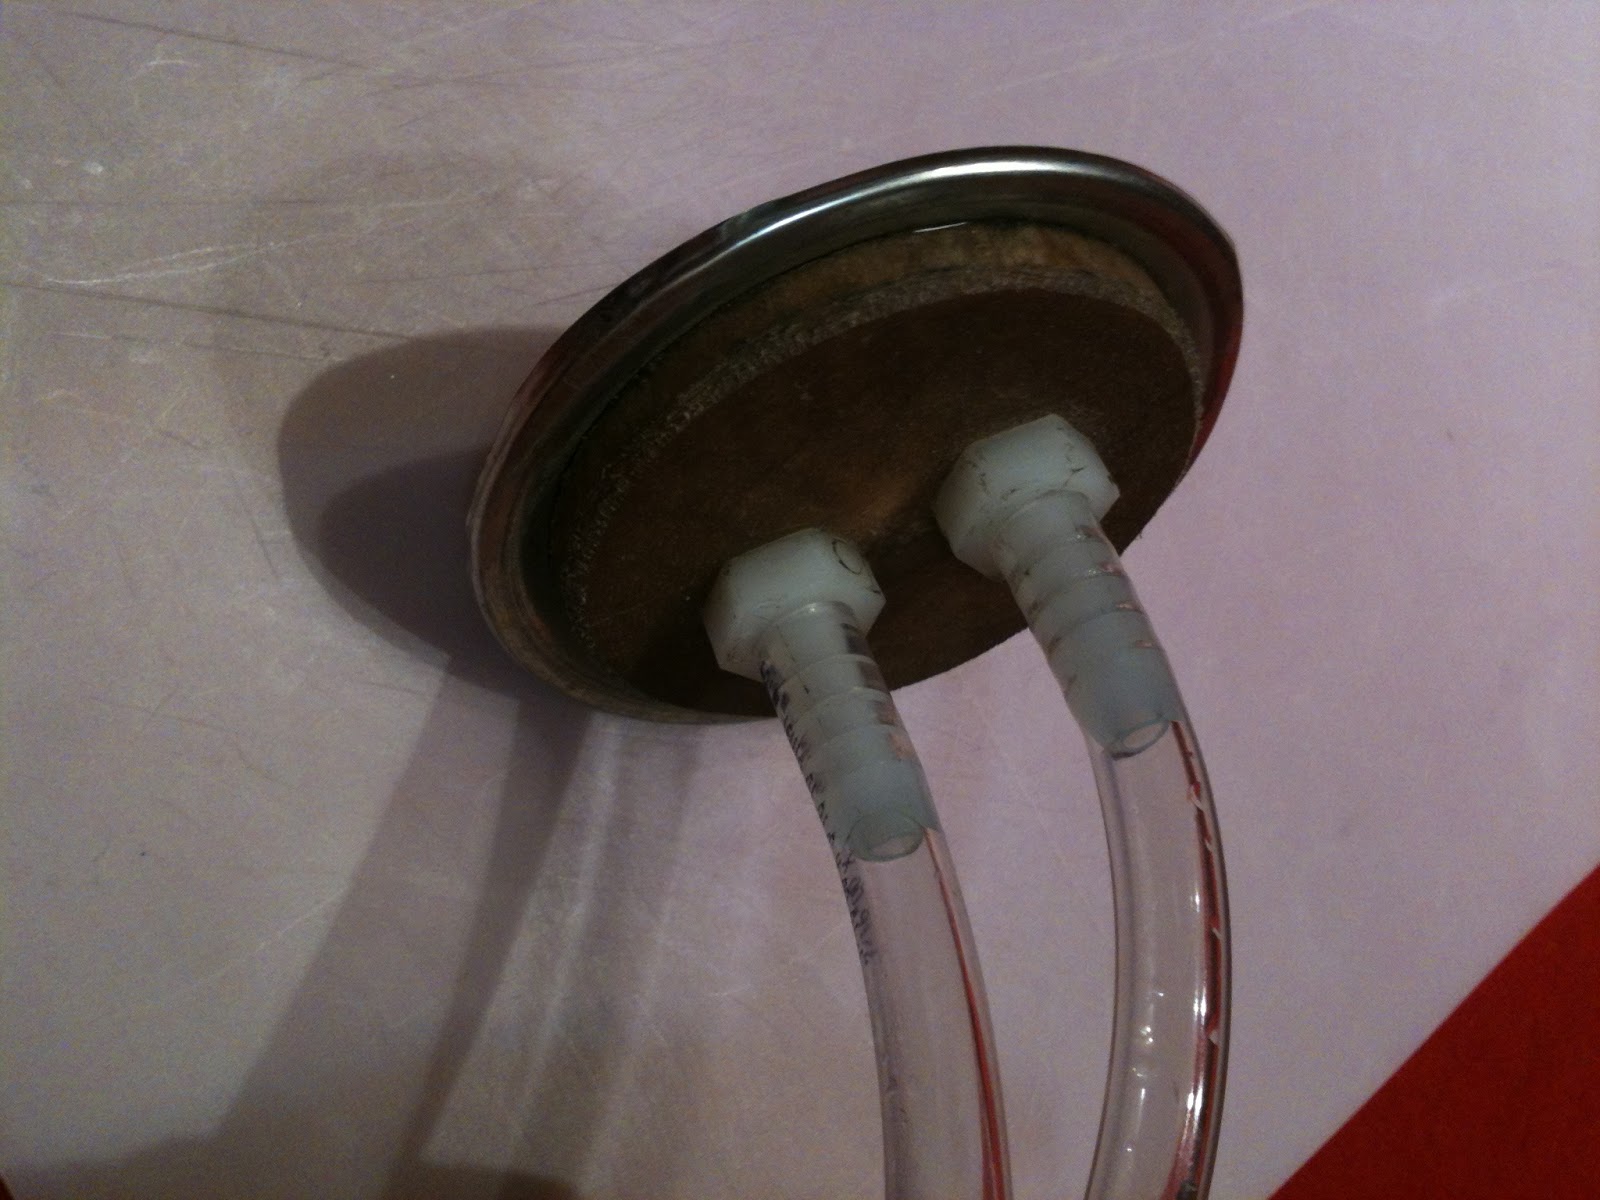
two boots full of water, marinating in the sink

I weighed both boots. I assumed they both held as much water as they could and the difference was boot weight not water weight. I do not know if this was correct - it was an educated guess, I suppose.

I stuffed one boot loosely with newspaper, left the other one empty, and placed both on their sides, with their open tops directed at our heat register. 

I changed the newspaper at 12 hour intervals for 72 hours. I weighed the boots every 24 hours and at the end of the experiment. 

There are some problems with this setup. I wish I had weighed the boots at 4 hour increments for the first day. Perhaps I missed differences early on.

And I did not have an elegant way to determine whether the boots were bone dry at the end.


My Results:

Saturated weight
Weight – 24 hours
Weight – 48 hours
Weigh - 72 hr
Weight lost
Boot 1
 684
 636
 633
 632
 52 g
Boot 2
 635
 586
 585
 585
 50 g

I have forgotten how to determine if a number is statistically significant. Maybe someone out there can analyze this data for me.

My Conclusion:

To me, the results suggest that either method works equally well.  This was slightly surprising because the newspaper I removed the first day was quite damp. I expected it to have removed water from the boot, but evidently a similar amount evaporated from the other one.

Discussion:

What was interesting about this test, was that all of my friends, who had pretty strong opinions on which method would be better, were content to give up their theory if it proved incorrect. It was fun, and the stakes were low enough that they could comfortably admit defeat.

We need to be like this more often. We have to make real life decisions, sometimes analyzing evidence that is incomplete. I'm thinking about gun violence right now, but a week ago, before the horror in Connecticut, I would have been thinking of climate change, or the economy, or any of a number of real things that generate a lot of heated disagreement. In these situations, as surely as in the frivolous story of my boots, it is not important to enter an argument being right - it's important to be right in the conclusion. If this means abandoning old beliefs in the face of new evidence, so be it.

I shouldn't defend a position because it's "mine" but because I've thought about it and tested it in whatever way I can. I should welcome and listen to opposing ideas, and if they are right, I should adopt them. This is important to learn in lighthearted, silly moments, so that we can do it when it matters and is harder.


Of course, we have values, about the worth of life, the value of freedom, and our relationship to entities greater than ourselves. These values exist outside the realm of these inquiry. But they should also stand aside when we use inquiry to settle questions of fact.

Above all, we need to base our decisions on what we honestly conclude to be the case - not on what we hope, or what doesn't interfere with our plans, or what we inherited as belief systems from the past.


Regardless of our opinions, we need to spend time making sure they are actually correct.

Otherwise, we are sillier than a bunch of ducks.
    shared on: frugal-days-sustainable-ways

Saturday, December 15, 2012

Goat milker - details and update

UPDATE ALERT: Please note: I've made some comments at the bottom about troubles we've encountered and how to solve them. If you have tried making a milker and it isn't working check there first.

From responses I got to the post on our new goat milker, as well as personal correspondence, it's clear that there is a real need for a low cost, low-ish tech, off-grid compatible alternative to hand milking goats. While there are a variety of options you can buy online, most are expensive - more expensive than they need to be.

Not only that, but most of us are makers and aren't looking for an off the shelf solution. We don't just want to buy, we want to build, tweak and understand. So here I am following up with my parts list, some pictures of how I assembled it, and most importantly, suggestions for things to try if you want to build up or down from my model. My husband David builds things heavy, solid and indestructible. He likes to reinvent the wheel, so he kept trying to introduce innovations like "let's build a special jar to go with this".

I'm more the quick and dirty improviser. If Mason jars work pretty well, I don't want to go looking for something better. If I already have an item or know where to buy it nearby, I'm apt to go with that instead of searching out or creating something new, even if it's substantially better. You may fall somewhere within this spectrum, or have your own design approach. I just want you to think about how this works and give it a try!

Our beginning parts list:

Everything but a jar and a goat

2 x 3/8" IDx 1/4"MIP  nylon hose barb/MIP adaptor - from the plumbing aisle of the hardware store

It might be in one of these baggies
barb/MIP adaptor

 2 x 1/2  1/4" nylon or brass nuts - also hardware store.

I could only find brass but I have to believe they have nylon ones somewhere.


Anyway it's fun to ask the guy at the shop if he has brass nuts.


4' of 1/4" ID (inner diameter) 3/8" OD tubing - elsewhere in the hardware store in a special area that sold tubing. Tubing is really cheap. Buy extra if you want to experiment. Also consider buying 1' of 3/8 ID tubing, which you can slide over the smaller tubing to help it fit onto bigger fixtures.
Two kinds of tubing and brass nuts

1 x 1/4" barbed T which I got at an aquarium supply store but also probably available at a hardware store


1 x Mason Jar lid and Screw Band
1 x mason jar (not pictured. I am just not photographer enough to try and get a good picture of one. Clear stuff!) anyway you probably know what they look like. It needs to be the same mouth size as your lid.


2 x 60 cc tapered tip syringes from a larger feed supply store (big epoxy paint supply stores may also sell these)


1 x Manual vacuum pump which we ordered online but may be available from an auto parts store as a brake bleeding pump. Ours is already hose clamped onto a length of tubing, and I left it that way for the picture.

1 x 1/4" to 1/2" hose clamp, which turned out to be overkill (it's holding the stem of this pump onto the tube. It would only be needed if you planned to be very rough with your milker. Like swing it around your head rough.)


2 x clamp on valves, from an aquarium supply store. We never actually use these. They came from an aquarium store.


Assembly: 


Drill or punch 2 x 1/4" holes in the jar lid. Insert the threaded half of the hose barb/MIP adaptors through the hole, and tighten the  nuts around them. 


You will see in the next picture that we have a wooden support which David added to the lid, thinking it was too weak to handle the pressure of milking. 

But gentle reader, he was wrong. A mason jar lid can take pressure canning, my friend. It would have been just fine without the wooden circle!


Cut two lengths of the 1/4" ID tubing - one 1' long and one 2'. You may shorten them later but I belong to the measure once, cut twice school so I always allow extra length. Dip one end of each piece in boiling water briefly, to soften it enough that is slides easily on to the barb. Work it all the way on. When it cools, it will shrink and hold on tightly.

Using the same boiling water trick, attach the center branch of your T connector to the longer tube. Now cut 2 x 6" lengths out of that last bit of 1/4" tubing and attach them to the other two branches.


Slide the clamps over the tubing. As I might have mentioned, we rarely use them, but with them in place, if you ever want to cut off flow to just one teat, you could. 


Slide the mason jar screw ring over the tubing and join it up to the jar lid, because once you do the next step it will be harder to do that.

Remove and discard the plungers from the syringes. Using the boiling water trick again, wriggle the ends of your 6" tubing onto the tips of the syringes. These are your teat cups!

You are now done except for adding suction. We hose clamped the manual pump to the end of the tube, but in hindsight we didn't have to. The suction will pull the tubing closer all on its own, you just need a tight fit. But yeah, overkill, that's our middle name.


 Now screw the lid onto a jar and go out to the barn! Clean the teat, just like always, but leave it slightly damp. Milk out one squirt on each side into a strip cup, just like always. Then set on the teat cups.The hardest part of the whole operation is holding the teat cups over the teats while you establish suction. I can do it on my own, but the first few times if you can get a buddy, do so. Hold one cup firmly but gently over each teat while pumping the hand pump. It takes me about 15 compressions before milk starts flowing, but before that happens, you should feel the teats get pulled slightly into the cups and you can let go.

Now milk is flowing. If your pump has a gauge, pump to10 and then let it coast down to 6 or 7 and then pump a bit more. If you don't, pump till milk is flowing strongly, then rest till it slows down, etc. When the flow begins to slow even at pressure, stop pumping, let the milk continue to trickle a bit, then break the suction by gently squeezing one teat to let air into the cup. The two cups will fall off. Spray the teats and you're done.


 The most important part of the whole operation is this: you need to stay in touch with the goat. You are no longer hand milking, so you need to even more involved in assessing her udder - is it lumpy? Is it tender or sore? Discolored? I have not had any problems with bruising, mastitis, or anything else really, but I examine and check every single time because I want this to be as positive for the goat as it is for me.

Now - to improvising. 


All you really need are some kind of vacuum device (to create low air pressure), tubing, a jar with a sealable lid, and teat cups. None of them have to be special purpose built items.

I experimented with a setup without the nuts and barbs. I used a large nail to punch holes in the lid of a jar, and then  just stuck two pieces of aquarium tubing into the holes so they fit tightly.  When we pumped, it created a vacuum and milked the goat. It was pretty flimsy. Eventually the lid will deform too much to form a seal but so what? A lid might cost twenty cents, so if it only lasts a few months before I need a new one, I'm still doing OK. I could probably reuse lids from canned goods, which you aren't supposed to can with a second time anyway.


I was an idiot not to use Tattler canning jar lids right from the start.

These are heavy, solid plastic lids with rubber gaskets, designed for repeated canning use. Their rigidity makes them perfect in this application. Buy a box of them and can with the rest.
I bought a battery powered food saver pump from the thrift store ($3.99, I couldn't resist). I ended up using it all the time. I like it much better than the hand pump. 
Its orifice was too big for my tubing so I bought some 3/8" ID tubing and, using the boiling water trick, I slid it over the smaller tubing on the pump end. I connect the pump orifice into it and it works great - even easier on my tendons than using the manual pump.


While at the hardware store buying nuts and barbs, I snapped pictures of two other possible pumps: a mattress inflator/deflator that might work on deflation mode, and an automotive pump designed for both filling tires and starting siphons. That would be handy to have around anyway, n'est pas? On the other hand, there is already enough stuff in the world. I encourage you to look for something simple, nearby, and useful in other respects. If you camp, get the mattress pump. Save food? Plump for a food saver pump, etc.


I'm sure there are other things you can tinker with. Today I tried using Turkey Basters as teat cups. This would eliminate one of the specialty shopping trips from the process.

The basters worked reasonably well but are too long and narrow - they made attaching the milking arrangement a bit too awkward.


If anyone wants, I will happily ship you the assembled lid and teat cup part of this system (everything but the pump, the jar and the goat) for a very reasonable fee - contact me! But as much as I'd like the business, I secretly hope you don't take me up on it. I want you to really own this system, and that means owning the process of making it.

April 28 update to this story. We have had trouble with some of our milkers and heard from others who have the same problem. 

If you did everything as directed and it's not working, try using the assembly without the barbs. Stick the ends of the tubes in hot water and squeeze them through the holes in a mason jar lid. If this works, it means you may have a bad fitting hose barb.

Apparently not all Nylon Hose Barbs are created equal. You need to find one with a 5/8" or wider hex nut. This won't be written anywhere on the package, you have to measure. I don't think it's a specification for the hardware as it wouldn't matter in most applications but the extra width is what seals it tightly to the jar. If you can only find the narrower ones you might want to experiement with silicone caulking them around the top. Choose a food grade caulk. Let it dry and wash well before use. 

We've also had better luck with Brass than with Nylon nuts but I don't know if that is because we used the narrower barbs with the nylon nuts.By the time we figured out the barb problem we had used up all the nylon nuts.

One more error, I did not fully describe the barb. I'm going to write out everything on the package:
WATTS Nylon hose barb 
Lead Free
PL-326
Adapter 3/8" ID x 1/4" MIP
10 mm x 8 mm

I found this by trial and error. If you have other products that worked I'd love you to share!!


Shared on: fresh eggs daily, Barn hopsimplejoyfullivingbackyard-farming-connection, Wednesday fresh food linkup, wildcrafting wednesdayssimple lives thursdaysfrugal-days-sustainable-ways

Saturday, December 8, 2012

Goat milking pump

Meggie - before milking
I enjoy the morning and night task of milking. It's always given me a special time with one animal; time to thank her for her abundance and for giving to us.

Meggie in particular is so undemanding. The other goats and the chickens vie for attention; milking is the one time of day she gets my undivided focus.

She is eating, which usually makes goats happy, but she seems to also relish the time spent together.

She is actually more OK with me milking  she was with her own babies after a certain age.


When I milk I do everything I can to keep myself and the goat calm, focused and happy.
I pat the goat, feed her, sing to her, and listen to her tummy gurgle contentedly as I milk.

Doesn't this look more comfortable?
Regardless of how they feel about being milked, it's got to be a relief to a goat to go from a full udder to an empty one. There can be well over a half gallon of milk in there! The pressure and weight are considerable. The goats always walk away from the milk stand lighter and happier.

But my tendons are another matter. After six years of milking , my wrists started to hurt.

I couldn't squeeze water out of a sponge without excruciating pain. My friend Mellow gave me some exercises to help, but I knew the real answer was to give myself a break from the repetitive motion.


When we saw a DIY milker featuring a vacuum pump designed for brake bleeding, we knew we had to try one ourselves. This is a manually powered pump, so I wasn't sure it would reduce the stress on my arms, but if I didn't try it, I was in danger of becoming totally unable to use my hands. So, we got the parts and made one. Here Noah tries it out (with soapy water and food coloring).
Noah pumping soap/food coloring to learn how it works
It was pretty simple. Everything was off the shelf except for the lid to the mason jar, which we had to modify.

Basically, the vacuum pump is connected by a 3/8" tube to the lid of a jar. A second tube connects to a pair of "teat cups", AKA two 60 cc syringes, which fit over Meggie's teats and form an airtight seal. The tubing is connected with aquarium airline connectors.

Milker setup


I was excited to try this system, but I found myself putting it off day after day. Which anyone who knows me will say is odd. Usually I'm someone who can't wait to try a new contraption.

I was having a hard time accepting that this less 'natural' system would be as gentle as my hand milking. Part of me was sure the syringes would either hurt Meggie, or suck her entire udder into them. Or at least, that she would resent me for using a machine for such a personal thing as drawing her milk.

You're squeezing our teats with a what?!?


Neither one happened.With some trepidation, I sprayed teat cleaner on Meggie's udder, wiped her clean, and set up the contraption.

 I placed the cups on her teats, awkwardly holding them in place, and pumped the suction up to 10.


The teat only was pulled into the syringe until it formed an airtight seal, but no further. It appeared perfectly comfortable.


                                                                                                                                                                                                                 Meggie went on eating serenely as her milk began to draw down the tubing and into the jar. First a trickle, then a steady stream.

I have said it before.Meggie is the ideal goat. She is productive, calm, cooperative and gentle. I call her bomb proof. But I had expected some kind of reaction to having plastic cups suctioned onto her udder.

Nope. Nada. Nil. She just kept calm and carried on.


I don't think the phrase "kick the bucket" was coined to mean "to die" by accident. After hand milking an animal and having her spill, kick, step in or poop in her milk, a person might be ready to do something extreme.

But in our case, it's surely not Meggie's fault. Meggie's legs occasionally cramp from standing still, and she picks her feet up. Once in a while, she used to put them in the bucket of milk, ruining it. 

With the milking device, this will be a thing of the past. nothing to kick over!


 Another advantage to a milking device like this is, the milk never touches anything but the inside of the tubing and the jar. A barn, no matter what, is a barn. Spiders, straw, goat hair, flies in summer, dust, and you can imagine other things all end up there. Hand milking controls as much of the mess as possible, but the milker gives much more assurance that the milk will be clean. I love that. Even more, I love that once its going, I can step away from the milking process, at least long enough to get a picture of my happy, busily eating goat.


Then I bring the milk inside and put a new lid on the jar. I put the jar in an ice bath, clean the milker, and voila. Another batch of milk. A milker would be especially nice for anyone with a goat who had funny sized teats, or for anyone who, like me, found her hands getting tired from milking. So far, the repetitive movement of pumping the milker has been just fine. And the milk is splendid.


Friday, November 30, 2012

Traditional curd mozzarella

As part of the cheesepalooza challenge, I am working my way though Artisan Cheesemaking At Home by Mary Karlin, with a blog description of at least one cheese from each chapter. I'm excited to try new cheeses, and to go back and self correct with varieties I've tried in the past and had poor success with. But I have to admit I was a bit reluctant with the Mozzarella.

Like most cheese makers, I have made Ricki Carroll's 30 minute mozzarella from my much beaten up volume of Home Cheesemaking. In fact, I may owe a bit of my belly fat to this recipe. It's so easy. Instead of acidifying the milk with a bacterial culture, which takes a good deal of time, you use citric acid, and "KAPOW" the milk is ready to turn into cheese.  It's so rewarding, and the finished, stretchy cheese is radically different from milk. You get a real sense of process in a compressed time.

On the down side, though, the thirty minute cheese is a bit on the overly stretchy side for me, and lacks some of the flavor notes you get from culturing milk. I like a very tender, sour tasting, delicate mozzarella, and, nudged by being in a challenge, I was finally willing to invest the significant amount of time needed to make it the old fashioned way.

Because although this cheese only takes one day to make, it does take most of that day. It's similar to pet sitting a puppy - you don't need to be there all the time, but if you neglect it at crucial times you will be sorry. So this is not a cheese to make with your high school best friend, who is only in town for one day, and wants to get pedicures in the morning and see Anna Karenina in the afternoon and then make something home made for dinner. It's not a good cheese to make with the Webelos den who can't braid a piece of string without getting in a fight. This cheese it takes anywhere from 7 to 16 hours to make, and requires attention intermittently throughout.

Recipe:


1 gallon milk
1/4 t thermo b starter culture
1/4 t calcium chloride diluted in 1/4 c dechlorinated water
3/4 t rennet in 1/4 c dechlorinated water
kosher salt
Cheese cloth
pH paper

Heat milk to 95 F (35 C) gently over 20 minutes. You will hold the milk at this temperature for the next two hours, so place the pot of milk in a sink full of warm water or devise some other water bath setup.

Add starter, mix well with a whisk for 20 strokes. Cover and ripen 45 minutes

Add calcium chloride, whisk in as above. Wait ten minutes, then whisk in rennet as above. Cover and leave for 1 hour, at which point it will be solidified curds in clear whey

Cut  curds into 1/2" cubes, cutting first one way, then at 90 degrees to form squares, then angling the knife to reach the bottom of the pan, creating slanted diamond like cube thingies. Leave undisturbed for 30 minutes, during which time more whey will separate from the curds.

Gently raise the heat, so that the temperature goes up to 105 F (42 C) over a thirty minute period. Stir/agitate the cubes gently as you heat. Continue to gently stir/agitate for ten more minutes, then let the curds settle to the bottom of the pot for 30 minutes. They will start to clump together, and continue to do so in the next steps.

Dampen cheesecloth in the whey, and use it to line a colander. Place a pot under the colander to catch the whey, and pour the curds and whey into the colander. The curds will drain for the next fifteen minutes. Then transfer them back to the pot they were in.

Let the curds sit in the pot for the next 2 hours, turning occasionally. Keep them warm. They will lose a bit more whey, that's OK. They will form a blob, also fine.

At the 2 hour mark, test the pH. If it is above 5.2, wait 15 minutes and check again. Repeat as needed until it gets to 5.2 or below. This is the part where you just need to go with it. If you don't wait, the cheese won't be stretchy, and if you wait too long it will be like hideous white milky sour bubble gum. Just right, and you will have tender, malleable mozzarella.

Once you hit that sweet spot, reserve one quart of whey and heat the rest of the whey and 1 quart water on the stove to 170 - 180 F (around 80 C), which is TOO HOT TO PUT YOUR HANDS INTO. Just trust me on this.

Cut the curd mass into 1" cubes, and place them, or some of them, in a stainless steel bowl. Pour on the hot whey - carefully. Use a rubber spatula to work with the cubes in the hot liquid, moving them around to form a ball. Now put on clean rubber gloves, and lift the ball out in your hands. Stretch it into a rope, and double it back on itself. This part should be worth everything that went before!!!

You can return it to the hot whey if it starts to tense up on you. Stretch and fold it a couple of times, to give it texture and shape. Then quite because you will make it rubbery if you work it too much.

Shape it into balls, and place them in a bowl of ice water.

Make a brine of 3 quarts whey and 9 oz salt and cool it in an ice bath. Place the cooled cheese in this brine for 8 hours, turning the cheese occasionally. Remove from the brine and serve or store covered in water to which you add a small pinch of citric acid.

How the cheese turned out:

This cheese failed.
A bowl full of failure


Instead of the tender, chewy, dreamy cheese I visualized, it broke apart into grainy morsels when I heated it. I double checked my pH - it was right at 5 with both testing strips, two different brands that both worked accurately on other substances.

I let the curds acidify another fifteen minutes and tried again, but results were the same.At that point the pH was below 4.9, and the curds tasted like sour yogurt.

I was using goats' milk, from my own goat who is in her 9th month of lactation. This would probably qualify as late lactation milk an may have been the problem. I know stage of lactation can change the cheesemaking process.

I was seized by a deep sense of discouragement, went to the hardware store and impulse shopped 25 feet of 1/4" soaker hose. When I got home, the kitchen smelled like hot whey and sour milk. I cleaned up and sat down to write.

Not really where my cheese ended up, just a reflection of my attitude toward it
I thought about skipping this post, but then I thought that great minds must not fear failure, they must learn to see it as experience, or experiment, depending on their goals. Would something like this stop Marie Curie? Mais non! I will publish my results, whether I got an acceptable cheese or not.

If nothing else, at least it won't end up in the trash. The hens never think I make mistakes. Sour curd is as good as any other in their book.


Shared on: Cheesepalooza


Sunday, November 25, 2012

A Greener Black Friday

As much as I don't want to, I have the desires of a consumer. I love shoes, hats, gloves and outfits. I'm a sucker for cool gadgets that do my housework for me. When I think about helping the environment, my mind spontaneously jumps to solutions that involve new stuff - solar panels, hybrid cars, low watt light bulbs. But while these things have their place, I believe that consuming got us into the environmental catastrophe we live with. I deeply distrust environmental solutions that involve buying our way out.

The day after Thanksgiving was a good day to start a road to buying less.  Black Friday, the biggest shopping day of the year, feels like a social event. We go out shopping as a community, to be around other people - it's bright, loud, fun and distracting.

I wanted to recreate that feeling of bustling activity, but in a more intentional way, focusing on taking care of what we already have instead of buying more things. The word stewardship seems to fit what I was looking for; a relationship with the world in which we strive to preserve the good things entrusted to us, instead of burning through them as fast as we can.


So this year, we celebrated Green Friday. I invited friends over for a mending and fixing party.

I had no idea how this would turn out. It had the potential to be either a hoot, or a serious failure.

Here I am, issuing an invitation to come sew on buttons, winterize rakes and shovels, sharpen knives, and generally do things we all put off because they are so unmotivating.

And to top it off, the invitation read "potluck - bring leftovers"

It took chutzpah to ask for this, but it paid off.

My younger brother selected the job of seasoning cast iron.

He took our crusty, rusty pans and scoured them with steel wool and green scrubbies.

Then he dried them well, heated them on a hot burner, and oiled them heavily.


There was a little smoke, and the smell of burning oil and hot metal.


And then the pan became glossy, black and clean.


A cast iron pan is like a phoenix, renewing itself by plunging into the fire.

 I knew this once, and seeing my brother clean this pan reminded me.


Thanksgiving week means rain in Seattle, and this year was no exception. I don't know what I was thinking, including garden tool restoration on the chore list.

This involves sanding the entire tool, wood and metal, wiping it clean with a dry rag, which soon becomes filthy with rust, and then covering the whole tool with several coats of linseed oil.

There is abundant red dust, and the oil smell is strongly fishy, not to by tried indoors. One spill and the house is marked.


Our amazing neighbors Corey and JJ asked to learn with our tools. They settled onto a bench out in the barn, and cleaned.

I felt  inhospitable for placing them out in the hay with the animals, and having them clean my stuff.  But they cleaned everything, then went home to start on their own tools. Eventually they were joined by other hardy souls lured out by the ever adorable ducks.


Madeline brought a troublesome knitting pattern she had been putting off trying.

Her goal was to use up all the odd bits of yarn, in one big, motley garment.
Cilla graded papers. This is her first year teaching ninth grade English. She is a scholar and a wise woman. But teaching kids who don't know or want to know the subject is really stretching her as a person.
Alas, there are no pictures of Nik making chain mail. This was a  surprisingly delicate job. He hooked together thousands of tiny metal links to form a fluid, comfortable looking metal mesh. It looked more like jewelry making than armor production. Nik started his project with ten thousand metal loops, and said he would need more. He should be busy for a while with this.

Meanwhile several kids sorted Pokemon cards. It may not seem like drudgery, but they had been putting this off, letting their cards get disorganized, and then wanting to buy more. Organizing helps them realize how many toys they already have, and appreciate them more. Possibly some trades were also negotiated.


But most people came to sharpen knives.
We already knew that many people put off knife sharpening. They either fear getting it wrong,  or  view it as something their dad did, but that contemporary humans are no longer able to - a lost art. 

This is very sad. A sharp knife is as much of a pleasure and as useful of a tool now as it ever has been. Sharpening a knife is a great place to start relearning those supposedly lost skills.

We use two stones - one coarse, one fine, and a leather strap. Party goers learned to grind the blade at an angle against the stones, rubbing away the blunt edge and creating a beveled surface so thin and sharp that a hair dropped on the blade is cut in half. 


It's always better to use a sharp knife.  It will put a smile on your face!


 Maya and Gary brought a mixer that needed new grease. This intimidated me. If they came to the party with a working mixer and left with a broken one, no positive event could turn the party around for me.

But it didn't intimidate Maya, Gary and David.

They had the lid off, the gears out, and new grease in place while I was finding a cinnamon stick to put in the cider.


 Some people buy fancy appliances and let them sit in the kitchen unused. Maya uses this mixer daily. She has used virtually every attachment. She doesn't think of it as a disposable item, and she didn't want it to be a mystery. She wanted real ownership - real understanding.

 We wanted that for our oven, too, but it didn't happen, at least not yet.

One burner is having ignitor problems. We thought - how cool would it be if we could fix it during a fixing party.

We didn't quite get it working again, but we will keep trying.


Overall, Green Friday was an outstanding success. People had fun while fixing things, and gaining a new appreciation and gratitude for the items they already have.

We will almost certainly do Green Friday again next year. I challenge others to try it too; I think you will enjoy it. It's a great way to share and teach skills, be with friends, and become better stewards.