Showing posts with label diy. Show all posts

Saturday, April 13, 2013

The great dissapearing lawn

It's always scary to move from the idea stage to the action stage.

This week, we took the first step in turning our sloping, grassy front lawn into a garden of fruits and nectar. But before we get to the beautiful vision in our heads, we have to put in the work to get there.

The hill in front of the house looks gracious and inviting, but in reality it has been anything but. The slope is too steep for comfortable mowing - there is always the lingering fear of falling down the side.

It's also too steep to play most games on. Rolling downhill or sledding seem fun except you would end up in a thicket of English Laurel, with a poorly lighted street on the other side. Less fun, that. Especially because we live across the street from a park with a nice flat grassy area plus a good sledding hill. We didn't need a less useful version of either.

So we are going to convert it into a garden.


We have wanted to do this for years, but dreaded the labor. Luckily, the neighboring community of White Center is home to one of the best equipment rental stores around. For $75, we rented a sod cutter for the day.

sod cutter and some rolled sod
This baby sliced through the grass much more easily than we imagined. It was harder than mowing the lawn, but much easier than rototilling. It didn't take over in quite the same way.


We did learn that if you cut sod, you should remove the cut strips immediately, either by lifting them or rolling them up. Otherwise you won't be able to see where you cut, and will either miss spots or slice up your nice strips into little tatters.


Four hours of cutting yielded 3500 square feet of bare soil. Or rather, soil with cut sod on it. We lifted the sod strips and piled them into long walls which followed the line of the hill.

This was hard work, and really dirty. But it was also fun - like making a fort. Using sod strips as building material was a new experience for us - but was once a common building method. The folks who did it to make homes, without the benefit of a sod cutter, were truly stout hearted.


It took David and me about 12 man hours to roll and stack the sod. It takes weight as well as strength to wrestle the sod rolls. Noah was not able to budge them, but he helped by working the broadfork to loosen the soil.

Here is the slope with two rows of sod walls, positioned about seven feet apart down the hill. The walls ended up about eight or nine inches tall. We expect they will settle with age and time but remain as boundaries to the edges of each garden bed.


In all, we made three long terraces. They should act as water catchments, slowing the percolation of rain into the soil and storing winter moisture for our dry summers. All Meggie knows is she doesn't usually get to this part of the yard so she's excited.


Next we covered the hill with burlap bags.


Seattle is a coffee town. Many of the warehouses for the bigger companies will give you huge numbers of their bags. You just have to ask around and see who has them.


The hill used two full bales of bags - about 1600 of them. Each bag is about 4' x 2', or eight square feet, so we had 12800 feet of surface area.

That means we covered the whole area between two and three bags deep. We hope the bags will block out light and prevent any residual grass from growing back out. More crucially, they should hold the soil in place between now and our next steps - adding mulch and planting the garden.


Laying out the bags was unbelievably fast. David arrived with the bags at 11:30. Then we built a campfire and roasted hot dogs and veggie dogs. Then we started laying out the bags.


Two or three hours later, the rain started and Noah went inside. By four, David and I were done. The rain weighted the burlap so it conformed with the  contours of the hill.


From our new staircase, you now see a rounded beige hill off to your right.

It looks like some one's paper mache project. Or like a pair of khaki pants cast off by a giant.

As the rain softens the fabric I am starting to see the higher ridges where the walls of grass and soil rise up.

Right now we are all tired. The school break is over so I go back to work and Noah goes to school.


The hill will wait. Soon our buddy Heath will call to ask where we want him to drop some wood chips.

We will be ready!


 To be continued...


shared on: backyardfarmingconnection, homestead-barn-hop-107,gastronomicalsovereignty.com, frugal-days-sustainable-ways-68, simple-lives-thursday-143

Thursday, March 7, 2013

Yogurt becomes sublime

With Meggie the goat giving abundant milk, our home is never without yogurt. Our yogurt is made without extra dried milk, stabilizers, gelatin, or other additives. Just milk and starter. It is thinner than the kind you buy, too thin to scoop out of the container. Straining if for a few hours yields thick, creamy, Greek style yogurt, plus whey to feed the animals or bake with.

Every day I cut up fruit for breakfast, spoon on yogurt, and drizzle on honey. And every day I wondered if the honey could be mixed in earlier in the process.

Most honey from the store is pasteurized, but at Several Gardens Farm honey is raw, never heated above body temperature.This allows it to keep all its delicate floral profile,but it crystallizes in our cold house. I got tired of our honey's grittiness and inability to mix well with the yogurt.  It forms sweet, sandy lumps, cloyingly perfumed. I  miss the smooth texture, though not the bland taste, of store bought honey.

So as an experiment I mixed the honey in with the milk before I made the yogurt. I also tried a batch of chocolate yogurt. I wasn't sure how it would work. Perhaps the enzymes would interfere with thickening?

Who cares. I am always up for trying something.

Recipe - honey yogurt and chocolate yogurt

Ingredients:

2 quarts milk - we use raw goat's milk
1.5 teaspoon yogurt culture, or 1/2 cup cultured yogurt
2 - 4 tablespoons honey, to taste
Chocolate syrup to taste

Directions:

Place the milk in two, one quart mason jars.


Immerse jars in water to their necks in a saucepan large enough to hold them comfortably

Heat gently until the water just boils. Turn heat to low and simmer  until milk temperature is 175

Remove pan from heat. Let cool naturally till milk is 120

For Pete's sake, don't put jars of hot milk into ice water to cool them faster. It will cause them to crack

Yogurt after draining
Stir the honey into one jar - it should taste sweet but not cloying

Stir the chocolate into the other jar - it will taste like hot cocoa

Stir 3/4 t yogurt culture into a a few tablespoons of the milk from one jar. Once it is mixed, stir it into the whole jar.

Repeat with the other jar.

Place lids on jars

Return the jars to the pot with the water. Put the pot containing the jars into a warm oven

My oven's minimum recorded temperature is 150. I have found if you set it between there and zero it will maintain a warm incubation overnight

Leave the milk for 8 hours, at which time it will have thickened into yogurt.

Refrigerate until cold.
The ducks loved this whey

Line a sieve with a double layer of butter muslin, or with a large coffee filter.

Place a bowl underneath to catch the whey, and pour in the yogurt.

Check it every hour, and when it reaches the texture you want, spoon it into a storage container and refrigerate until serving time.

The whey can be used for baking or fed to livestock. This whey could probably serve as a sweetener for lemonade.


Taste Results

Honey yogurt

This is the best yogurt I've ever eaten. It tasted like the angel wings of baby kittens. It tasted like the Moonlight Sonata.


David said it was better than fancy schmancy yogurt from the store.


 Noah exclaimed that it was "fruity... ambrosial... I can taste how good the milk was. I love our goats!"


I could detect flavor notes from the flowers our bees had visited and the grassy orchard where the goats had browsed. It made me think I was outdoors feeling the warm breeze on my skin.

It tasted like a promise fulfilled. Yeah, it was milk and honey like the Good Book makes you think it will taste.

I will be making more soon. Maybe right now.

Chocolate yogurt

Sour and chocolate just don't belong together, especially when they are also sweet. This tasted fermented and abrasive and just nasty. Also, the cocoa solids sank during the yogurt culturing process leaving a pale brown yogurt with dark crud in it.

It looked exactly like something you find in a diaper. In a rare fit of good taste, I chose not to post my only photo of it.

The whey was sour, and looked like old coffee. I was not pleased with this yogurt. It almost made me not want chocolate for a few minutes!

It was that bad.

I will try making it again because I'm not easily deterred. I think the idea is good, I just missed something in the execution. I used the first soluble chocolate product that came to hand. This was a cheap and not very good chocolate syrup. Next time I will use honey and cocoa with a good dose of vanilla.

What I learned

You can make yogurt with flavored milk and get good results. The flavor will carry into the yogurt, though the sourness will modify it in unpredictable ways. The culturing process is not disrupted by adding ingredients.


Curry yogurt

After my first success, I tried again with curry flavors. Same routine, only I tried stirring in 1 tsp of my favorite blend of curry seasonings into a quart of milk. The yogurt turned a lovely, sunshine yellow with darker golden streaks. The flavor was perfect. The rawness that bothers me in turmeric was softened by the long soak in warm milk, leaving a smooth, satiny texture and a spicy but moderated flavor. The thick, creamy texture felt so rich in my mouth!

Also it was gorgeous dolloped on top of cooked greens, much prettier than cooking the curry and yogurt in with them.


Recipe:

Ingredients:

2 bunches spinach or spinach and mustard greens, stems removed
3 T neutral oil or ghee
1 tomato, chopped
1 small hot pepper or to taste, chopped
1 sweet red pepper, cut into strips (optional)
1/4 onion, chopped
salt and cumin to taste
6 oz paneer cheese or halloumi (less conventional but good), cubed into 3/4" dice
Flour for dredging
Curry yogurt from 1 quart of milk

Directions:

Pat cheese dry with paper towels or lint-free napkin
Lightly coat cheese surfaces with flour
Heat 2 T of the oil or ghee in a pan till nearly smoking
Fry the cheese, tossing and turning it to brown without sticking
Remove to a plate and set aside
Heat 4 cups of water to boil, and briefly blanch the greens
Drain, reserving 1 cup of cooking liquid.
Refresh greens with cold water, and squeeze out most of the extra moisture
Chop greens fine or pulse briefly in food processor.
Heat the remaining oil in the pan at medium. Saute onion and optional salt and cumin till onion is limp
Add chopped tomato, greens, optional sweet pepper and hot pepper.
Turn heat to low, and simmer fifteen minutes or till thick
Place greens in a bowl. Top with cheese, and serve with dollops of curry yogurt


What will I try next?

I know this yogurt flavoring technique would work for vanilla and brown sugar, maple syrup, or salted caramel. Could I make ranch dip this way? Or eggnog flavored yogurt? Coffee or Chai tea? Saffron? Maybe taco seasoned dipping yogurt? What, oh what, shall I try next?

Shared on townsend house,Foodie Fridays, wildcrafting-wednesdaysimple-lives-thursday


Friday, February 22, 2013

Making Miso


Miso making supplies

 Quite Simply, I love Miso!


Anyone who knows me will eventually have to endure my obsession with miso.

I eat a simple version of miso soup for breakfast - miso stirred into nearly boiling water. I fancy it up with vegetables, rice, tofu, sea veggies, eggs, or anything else around. I make gravy out of it, or mix it with tomato juice for a refreshing but weird beverage.

It was only a matter of time before some strange mental compulsion led me to make my own. I reasoned, falsely, that it would save money. Or that it would be healthier than the miso I can buy. At least I can buy soy beans that say they are GMO free.

Since I had never made miso before, I didn't have very high expectations. In my experience, it takes a little practice to learn new fermentation projects, even if you think you're doing everything right. In this case, round one was a clear failure.

Miso Fail


My first miso attempt. I began it in March 2012, opened it Feb 2013.

The surface of the aged miso was coated with white, powdery looking mold, which was easily skimmed off. All the books mentioned mold like it was no big deal, so I didn't let that scare me.


I had opted for 'chunky'.Ugh. The very word should have warned me.I found the texture of cold, salty, fermented whole soy beans repulsive.  In future I will thoroughly mash the beans.

Far worse, the miso was rendered inedible by a strong aroma and taste of nail polish. This means it fermented wrong and produced acetone. It fermented badly. It can't be fixed.

I used precisely the proportion of ingredients specified, so it must have been my production methods that led to failure. I think I either let in too much oxygen or didn't press the solids down firmly enough.


Miso's byproduct is tamari (as in soy sauce) which is supposed to float to the surface.In my batch, it didn't, instead remaining mixed in with the miso. I think it was the failure of the tamari to separate that killed the miso, diluting its saltiness and causing a bad fermentation.


Plus, I have to be honest, it tasted like cheap soy sauce you might buy once and make a mental note not to get it next time.


But it's all mine! I was excited to have produced some kind of useful product from this whole fiasco.


Starting Over


When I made the first batch, I used a food grade white plastic bucket. This time I have an actual fermenting crock, which should make a more airtight seal, as well as allowing me to weigh down the miso better.
Hallelujah. I love this fermenting crock!

I was understandably shy of my second try at miso. Before I started, I wanted a quick success, so I made a batch of Amazaki.This is a sweet, mildly fermented rice beverage that turns out to be drop dead easy.I cooked some rice, cooled it to the warm end of lukewarm, mixed in the Koji starter that is also used in miso, and put it in a warm oven overnight. By morning it was so sweet, my husband thought I'd added honey. It will be good mixed 1:4 with our oatmeal instead of honey or sugar. I might see if I can make oat Amazaki, which would be delicious.

With a clear win under my belt, it was time to make some miso. The Koji came with instructions, which I am following. I recommend reading through The Book of Miso by Shurtleff and Aoyagi, for much more in depth information.But in some ways they gave so much information a first time user can get paralysed by it, so a one sheet recipe was helpful.

I increased the recipe because you are supposed to make multiple batches and combine them.I cooked and mixed them all at once, in my giant pressure cooker. Hopefully this won't be a problem.


Unsoaked soy beans are almost spherical
Soaked beans, look like any other bean
First I soaked 8 cups of soy beans overnight.

I discarded the soaking water and the huge quantity of hulls that floated off the beans.

I cooked the beans in a pressure cooker for 20 minutes. I assembled the cooker wrong so it did not raise its pressure. After 20 minutes of trying I gave up and simply cooked the beans the old fashioned way, boiling them for 4 hours until they could be, in the fine words to the Book, "crushed easily between the tips of the thumb and the ring finger".


A small sampling of my gigantic hull collection
Once I the beans were done and slightly cooled, I removed yet more hulls. The hulls were endless.Whenever I thought I was done - presto - more!

I then cooled the beans to 110 degrees, pulverized them and mixed them with 6 cups of their cooking liquid,  koji, and salt. 2 1/2 cups of salt. I made the mistake of tasting the mixture last time and it was salty enough to give me an upset tummy and cause a temporary weight gain. At the time I described the recipe as using enough salt to "kill an elephant". To each 2 cups of beans, I also added 1 1/2 T of "seed" miso.

I then salted the inside of my crock, packed it with the miso-ingredients, covered it with more salt, and sealed it under a sheet of plastic wrap. On top of that were the weights and then the lid with its water seal. No air could get through all those layers, I hoped.


Is it worth trying again?


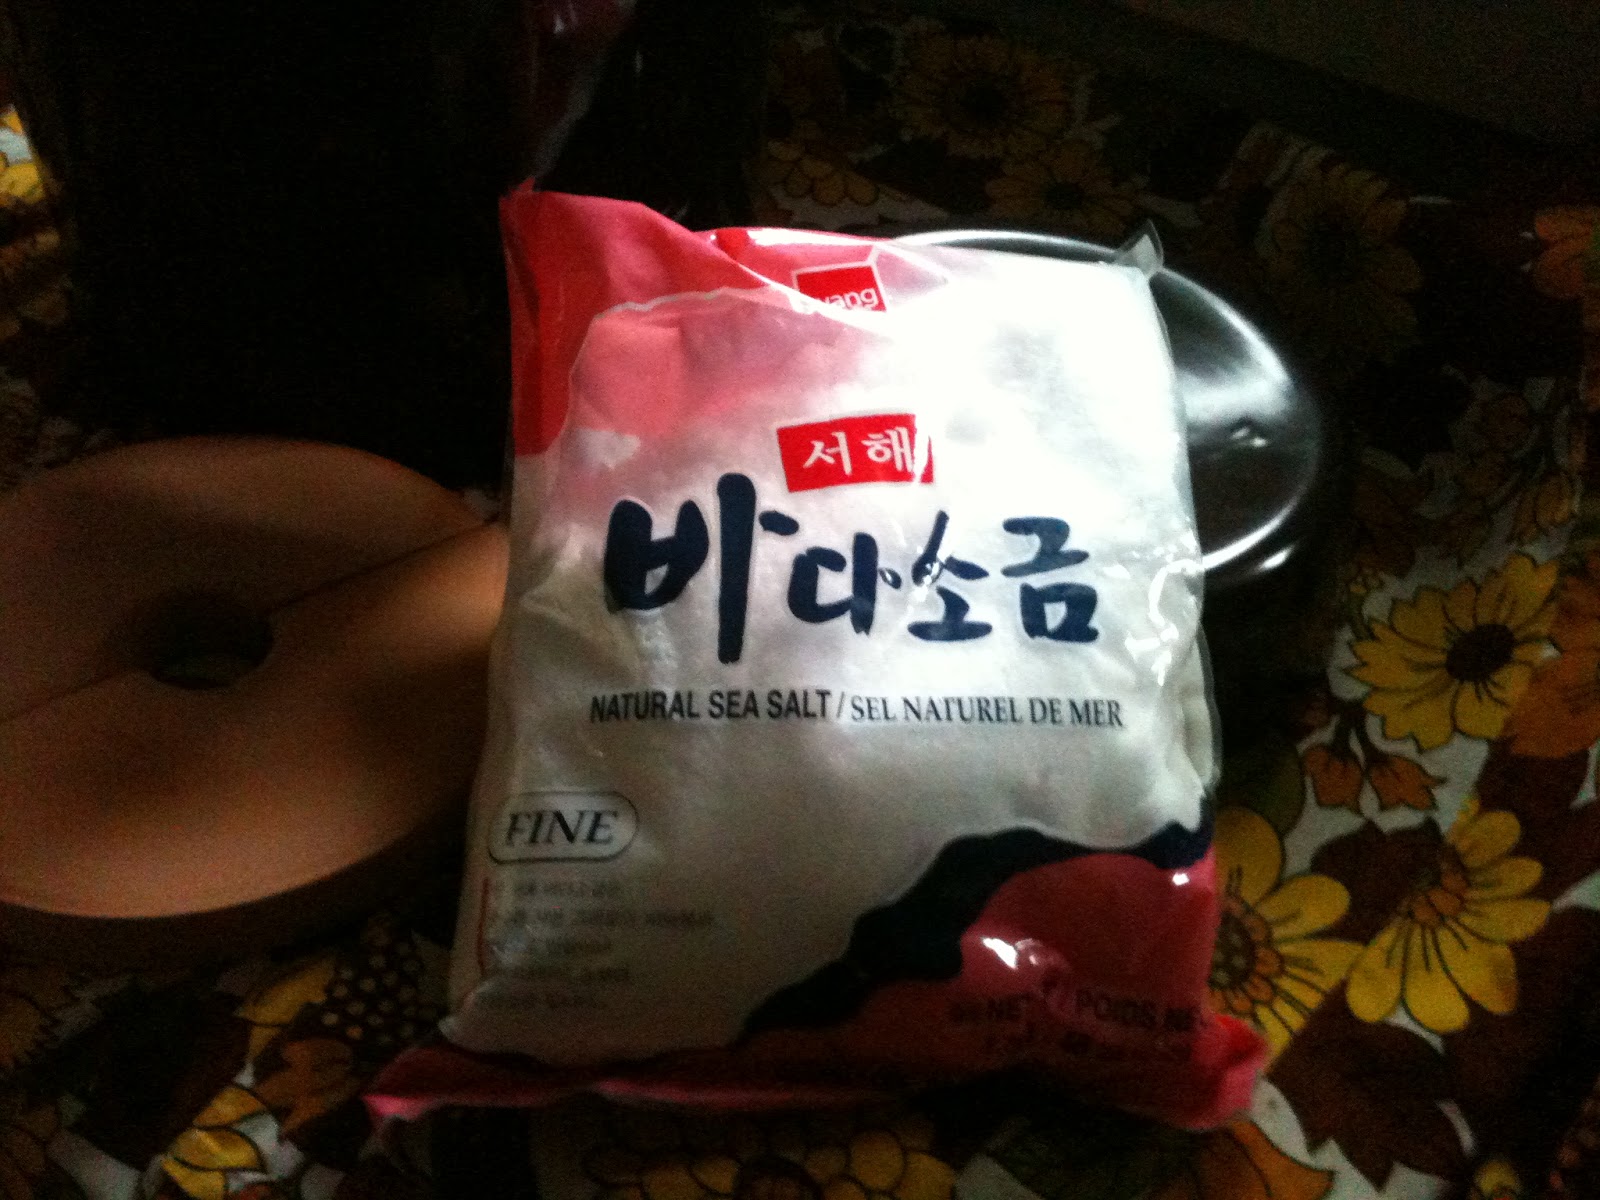
Salt - the not so secret miso ingredient

The time and resources invested were pretty minimal. Prep time was a couple of hours. The aging time was long (I left it for nine months) but aside from checking on it, there was no work involved in that part. Both salt and soybeans, even certified GMO free, are cheap. The bucket was free. The new crock was expensive but I will use it in other projects too.

If this second batch is a success I will continue making miso. If it fails, I admit I will be discouraged. We'll know next spring.

I find I don't particularly mind initial failure. Failure can help me assess how important something is to me. If I want to succeed, I don't begrudge the time, thought and energy to do a postmortem, recheck my equipment and try again. If I feel like quitting, it's likely this wasn't that important to begin with.

I'm not thrilled with trying to dispose of half a gallon of stinky miso, either into the waste bin or into myself, but if I can learn to make a good product in a couple of tries I'll have a lifetime of useful miso in exchange for a few questionable batches. My only real reservation is there's no way to make a small "test" batch, so whatever results I get, I'll have a lot of them.


Oh well. As the old riddle goes:

Q: Which is better, good food, or bad food?

Answer: Bad food. Because bad food is still better than nothing. And nothing is better than good food.

Inspiring, isn't it?

Although in this case, the round one miso may be worse than nothing.

Shared on: homestead barn hop


Sunday, January 27, 2013

Making a souffle

Lots of eggs - chicken and duck
Strange things happen when you have an essentially unlimited supply of eggs, but none stranger than Our sudden infatuation with the souffle.

To me, this concoction suggests a nineteen fifties housewife making post-golf brunch for her hubbie and his boss. When my cousins came over for dinner, they had never made nor eaten a souffle, and were as skeptical of us making one as they might be of us hunting a unicorn. The reputation of souffles as fussy, collapsible, kitchy and anachronistic is overrated. If you have an electric mixer and a working oven, a souffle is within your grasp.And unless your doctor has you on a strict diet, one serving will do fairly minimal damage to you diet.

The one proviso is you really do need to eat it within a few minutes of baking.

This recipe was modified from the Joy of Cooking.  It serves 6 to 8 people as part of a meal.

Recipe

6 Eggs
1 1/2 cup milk
1/4 cup flour
1 Tablespoon butter
3/4 teaspoon salt
pepper to taste
1/4 teaspoon cream of tartar (optional)
1/2 cup shredded cheese

Preheat oven to 350.Butter a souffle dish, or a Pyrex bowl if you don't happen to be set up for souffles.It's a myth that only a straight sided dish works.You may powder the outside of the dish with finely grated dry cheese, such as Parmesan.

white sauce in the blender
Make a white sauce: Melt butter over low heat and stir in flour. Let flour cook till slightly golden. Stir in milk, a bit at a time, breaking up lumps as you go. When it's all stirred in, bring it to a gentle simmer, stirring continually to keep the bottom from burning.

Add pepper to taste and remove from heat.

I don't actually do all that. I place the milk, butter, flour and salt in a high speed blender and run at full power till it heats up and steam starts to come out the lid. Then I drop in the cheese and run another 60 seconds, turn it to low and mix in the pepper.

This makes a perfectly smooth, creamy white sauce, but it does not work in a standard blender, only a fast one like the Vitamix. For such a farmy, DIY person I sure love some electric appliances a lot.


Separate the egg whites from the yolks.

You can do it like my mom taught me to - pour the yolk from one half of the shell to the other,over a bowl.


Or crack the egg into a (clean) hand, cupping the yolk in your palm and letting the white pour through.


Pride goeth before a fall. if you make the arrogant mistake of separating your last egg into a bowl with the other whites, you may ruin them all.

Always always separate each egg over an empty bowl, not over the precious egg whites you've already separated.

 Even a tiny bit of yolk in the whites will cause them not to expand when whipped.


fluffy beaten whites


Place the egg whites in a mixer bowl. Add the optional cream of tartar and whip till they are white and puffy like cumulus clouds.


Bright yellow yolks


Put the egg yolks in a bowl that will hold at least twice their volume.Add about 1/2 cup of the white sauce.

Stir to combine with the yolks, then mix the yolks in with the rest of the white sauce. This sounds fussy but adding the sauce in two installations keeps the heat from cooking the yolks.


If that happened you would get blobs of grainy yellow crud in your souffle, and the magic would be destroyed.

Trust me. My wisdom comes from experience.

Stir in the cheese if you didn't do it during the high speed blending above.

Mixing in part of the whites to lighten the mix
Now it's time to fold the yolk mixture into the whites.


Folding is delicate work. Start by mixing about 1/4 of the beaten whites into the sauce mixture. Stir gently, with a wide spatula or wooden spoon. You are trying to incorporate air into the sauce so it's lighter.

Gently folding

Then scrape all the sauce into the beaten whites, and gently, with a spatula, lift the whites up to mix them in with the sauce. Keep gently lifting whites from the bottom and setting them over the sauce. Don't stir around and around. The more gently you do this, and the more you lift rather than stirring, the puffier your souffle will be. When you only have a few spots of pure whites left, you're done.

Over mixing to the point where it's perfectly uniform will break too many air bubbles in the whites and your souffle will not by as puffy.


Scoop the mixture into the dish and place in the center of the oven rack.


Bake 30 -40 minutes, until dark golden brown on top. It will puff up substantially and have a little 'hat' of golden brown crust over a body of creamy, puffy orange-yellow fluff.

Serve immediately.


shared on: townsend-house.comhomestead-barn-hop-96,nap-timecreations tasteful tuesdaysthe-backyard-farming-connection-17, wildcrafting wednesday ,the-wednesday-fresh-foods-link-up,frugal-days-sustainable-ways-63


Friday, December 21, 2012

A tale of two boots

In Seattle's rainy December it's easy to forget that I ever felt sun on my face. The nights are long, the sun low in the southern sky during its brief visits, even at noon. At least some part of nearly every day, we get rain, sleet or falling slush.

The goats and the chickens feel about as excited as I do. Lightning is afraid of the dark, Jeannette  sleeps the day away. Meggie is stoical, as she so often is. The chickens find dry spots and just hunker down in them, occasionally foraging for the abundant worms that rise up out of the saturated ground.

The ducks, bless them, love this weather. 


They live for water, and their coats resist all attempts to dampen or chill. The back of the yard is under water.


Areas are barely submerged and swampy, others deep enough for them to swim around. They dabble about, fishing up sluggies and worms and unfortunate beetles that didn't get out before the rains. 

One night, they refused to come in. Maybe they would have been safe. Most predators would be less skilled in the water than they are, but I've lost ducks to raccoons before and I was taking no chances. Out I ran, boots sinking in the muck, to round them up.


By the time I got them all to bed, my feet were encased in big gray rubber bags of wet.

I drained my boots, blotted them out with a towel, set them in the mudroom and went to bed. Predictably, the next day they were as damp as ever.

I have a very good rapport with a wide circle of facebook friends. When my boots get wet, I tell people, and they make suggestions. There were two main schools of thought:


  1. Stuff dry, crumpled newspaper into the boots to absorb the water
  2. Let air circulate through the boots - doing nothing to obstruct the rapid flow of moist air out

People did not agree which method was better, and speculated at length. Both groups agreed I should do an experiment to see who was right.

My Experiment:

I filled both boots to the tops with water. I left them for ten minutes, to fully saturate any crevices. Then I held each boot by the heel and drained it for five minutes. 
two boots full of water, marinating in the sink

I weighed both boots. I assumed they both held as much water as they could and the difference was boot weight not water weight. I do not know if this was correct - it was an educated guess, I suppose.

I stuffed one boot loosely with newspaper, left the other one empty, and placed both on their sides, with their open tops directed at our heat register. 

I changed the newspaper at 12 hour intervals for 72 hours. I weighed the boots every 24 hours and at the end of the experiment. 

There are some problems with this setup. I wish I had weighed the boots at 4 hour increments for the first day. Perhaps I missed differences early on.

And I did not have an elegant way to determine whether the boots were bone dry at the end.


My Results:

Saturated weight
Weight – 24 hours
Weight – 48 hours
Weigh - 72 hr
Weight lost
Boot 1
 684
 636
 633
 632
 52 g
Boot 2
 635
 586
 585
 585
 50 g

I have forgotten how to determine if a number is statistically significant. Maybe someone out there can analyze this data for me.

My Conclusion:

To me, the results suggest that either method works equally well.  This was slightly surprising because the newspaper I removed the first day was quite damp. I expected it to have removed water from the boot, but evidently a similar amount evaporated from the other one.

Discussion:

What was interesting about this test, was that all of my friends, who had pretty strong opinions on which method would be better, were content to give up their theory if it proved incorrect. It was fun, and the stakes were low enough that they could comfortably admit defeat.

We need to be like this more often. We have to make real life decisions, sometimes analyzing evidence that is incomplete. I'm thinking about gun violence right now, but a week ago, before the horror in Connecticut, I would have been thinking of climate change, or the economy, or any of a number of real things that generate a lot of heated disagreement. In these situations, as surely as in the frivolous story of my boots, it is not important to enter an argument being right - it's important to be right in the conclusion. If this means abandoning old beliefs in the face of new evidence, so be it.

I shouldn't defend a position because it's "mine" but because I've thought about it and tested it in whatever way I can. I should welcome and listen to opposing ideas, and if they are right, I should adopt them. This is important to learn in lighthearted, silly moments, so that we can do it when it matters and is harder.


Of course, we have values, about the worth of life, the value of freedom, and our relationship to entities greater than ourselves. These values exist outside the realm of these inquiry. But they should also stand aside when we use inquiry to settle questions of fact.

Above all, we need to base our decisions on what we honestly conclude to be the case - not on what we hope, or what doesn't interfere with our plans, or what we inherited as belief systems from the past.


Regardless of our opinions, we need to spend time making sure they are actually correct.

Otherwise, we are sillier than a bunch of ducks.
    shared on: frugal-days-sustainable-ways

Saturday, December 15, 2012

Goat milker - details and update

UPDATE ALERT: Please note: I've made some comments at the bottom about troubles we've encountered and how to solve them. If you have tried making a milker and it isn't working check there first.

From responses I got to the post on our new goat milker, as well as personal correspondence, it's clear that there is a real need for a low cost, low-ish tech, off-grid compatible alternative to hand milking goats. While there are a variety of options you can buy online, most are expensive - more expensive than they need to be.

Not only that, but most of us are makers and aren't looking for an off the shelf solution. We don't just want to buy, we want to build, tweak and understand. So here I am following up with my parts list, some pictures of how I assembled it, and most importantly, suggestions for things to try if you want to build up or down from my model. My husband David builds things heavy, solid and indestructible. He likes to reinvent the wheel, so he kept trying to introduce innovations like "let's build a special jar to go with this".

I'm more the quick and dirty improviser. If Mason jars work pretty well, I don't want to go looking for something better. If I already have an item or know where to buy it nearby, I'm apt to go with that instead of searching out or creating something new, even if it's substantially better. You may fall somewhere within this spectrum, or have your own design approach. I just want you to think about how this works and give it a try!

Our beginning parts list:

Everything but a jar and a goat

2 x 3/8" IDx 1/4"MIP  nylon hose barb/MIP adaptor - from the plumbing aisle of the hardware store

It might be in one of these baggies
barb/MIP adaptor

 2 x 1/2  1/4" nylon or brass nuts - also hardware store.

I could only find brass but I have to believe they have nylon ones somewhere.


Anyway it's fun to ask the guy at the shop if he has brass nuts.


4' of 1/4" ID (inner diameter) 3/8" OD tubing - elsewhere in the hardware store in a special area that sold tubing. Tubing is really cheap. Buy extra if you want to experiment. Also consider buying 1' of 3/8 ID tubing, which you can slide over the smaller tubing to help it fit onto bigger fixtures.
Two kinds of tubing and brass nuts

1 x 1/4" barbed T which I got at an aquarium supply store but also probably available at a hardware store


1 x Mason Jar lid and Screw Band
1 x mason jar (not pictured. I am just not photographer enough to try and get a good picture of one. Clear stuff!) anyway you probably know what they look like. It needs to be the same mouth size as your lid.


2 x 60 cc tapered tip syringes from a larger feed supply store (big epoxy paint supply stores may also sell these)


1 x Manual vacuum pump which we ordered online but may be available from an auto parts store as a brake bleeding pump. Ours is already hose clamped onto a length of tubing, and I left it that way for the picture.

1 x 1/4" to 1/2" hose clamp, which turned out to be overkill (it's holding the stem of this pump onto the tube. It would only be needed if you planned to be very rough with your milker. Like swing it around your head rough.)


2 x clamp on valves, from an aquarium supply store. We never actually use these. They came from an aquarium store.


Assembly: 


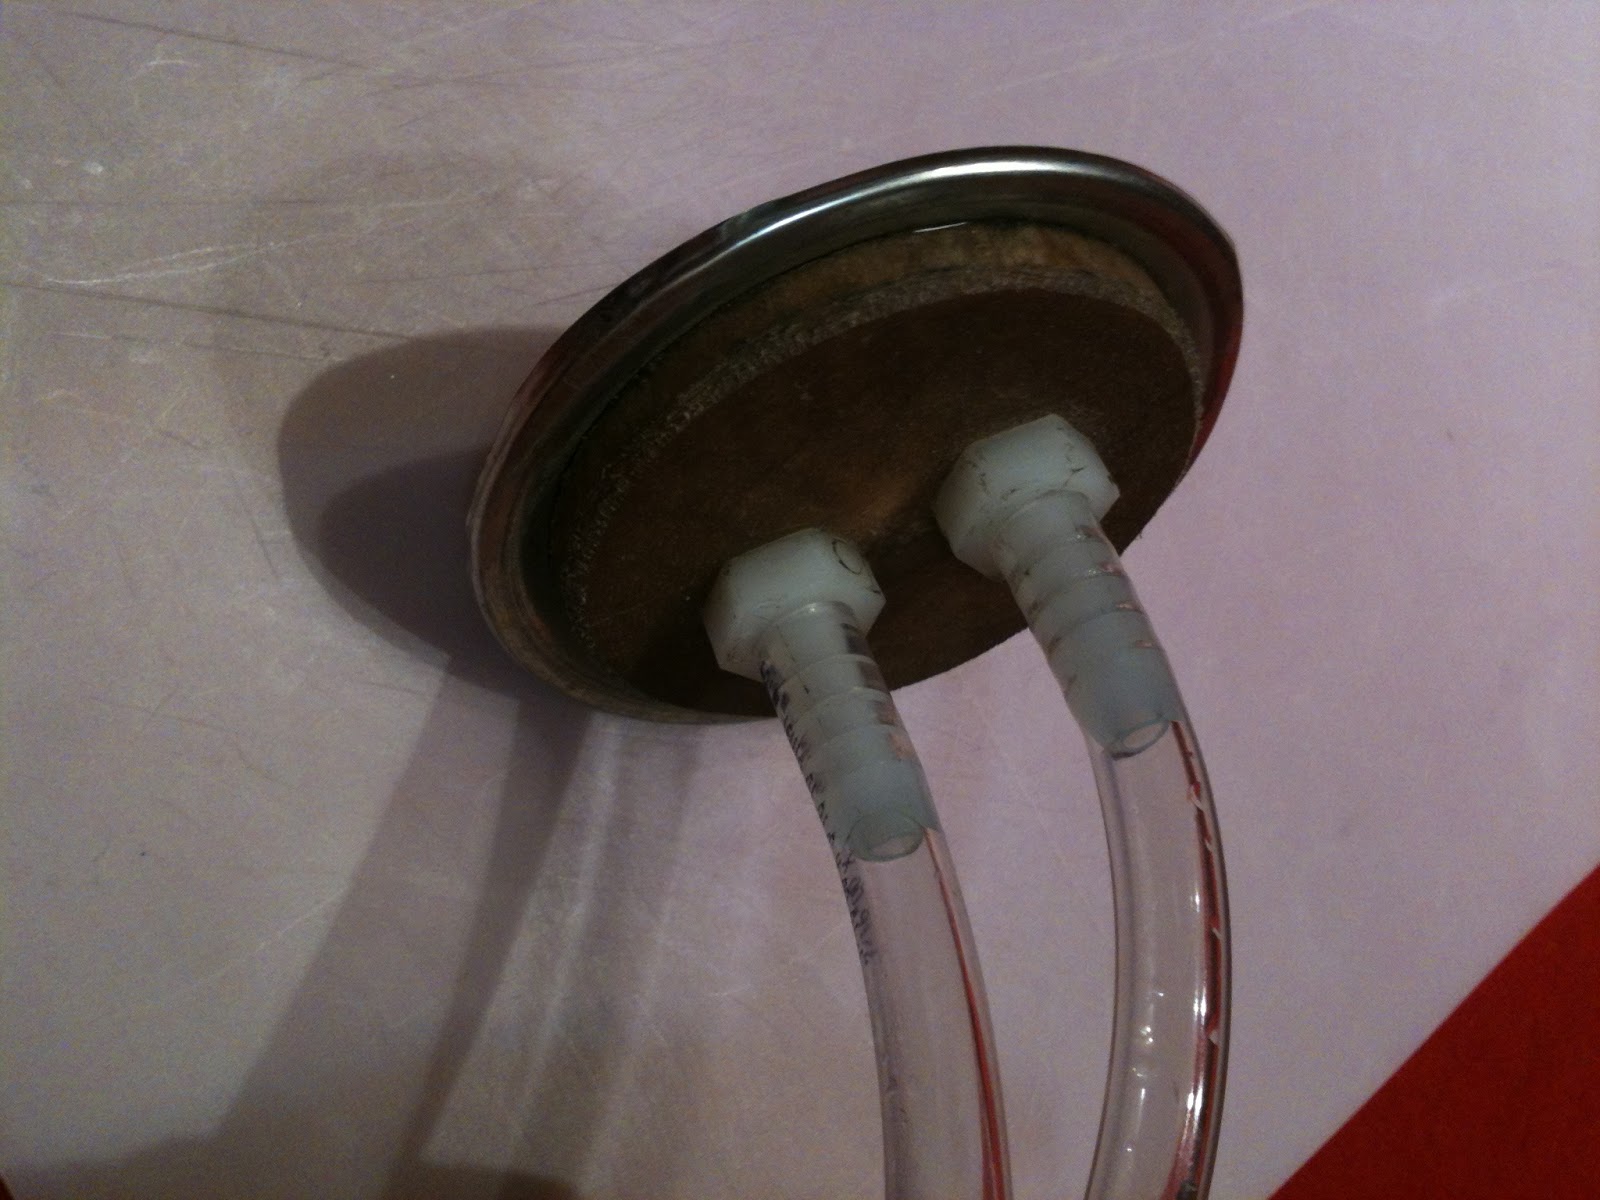
Drill or punch 2 x 1/4" holes in the jar lid. Insert the threaded half of the hose barb/MIP adaptors through the hole, and tighten the  nuts around them. 


You will see in the next picture that we have a wooden support which David added to the lid, thinking it was too weak to handle the pressure of milking. 

But gentle reader, he was wrong. A mason jar lid can take pressure canning, my friend. It would have been just fine without the wooden circle!


Cut two lengths of the 1/4" ID tubing - one 1' long and one 2'. You may shorten them later but I belong to the measure once, cut twice school so I always allow extra length. Dip one end of each piece in boiling water briefly, to soften it enough that is slides easily on to the barb. Work it all the way on. When it cools, it will shrink and hold on tightly.

Using the same boiling water trick, attach the center branch of your T connector to the longer tube. Now cut 2 x 6" lengths out of that last bit of 1/4" tubing and attach them to the other two branches.


Slide the clamps over the tubing. As I might have mentioned, we rarely use them, but with them in place, if you ever want to cut off flow to just one teat, you could. 


Slide the mason jar screw ring over the tubing and join it up to the jar lid, because once you do the next step it will be harder to do that.

Remove and discard the plungers from the syringes. Using the boiling water trick again, wriggle the ends of your 6" tubing onto the tips of the syringes. These are your teat cups!

You are now done except for adding suction. We hose clamped the manual pump to the end of the tube, but in hindsight we didn't have to. The suction will pull the tubing closer all on its own, you just need a tight fit. But yeah, overkill, that's our middle name.


 Now screw the lid onto a jar and go out to the barn! Clean the teat, just like always, but leave it slightly damp. Milk out one squirt on each side into a strip cup, just like always. Then set on the teat cups.The hardest part of the whole operation is holding the teat cups over the teats while you establish suction. I can do it on my own, but the first few times if you can get a buddy, do so. Hold one cup firmly but gently over each teat while pumping the hand pump. It takes me about 15 compressions before milk starts flowing, but before that happens, you should feel the teats get pulled slightly into the cups and you can let go.

Now milk is flowing. If your pump has a gauge, pump to10 and then let it coast down to 6 or 7 and then pump a bit more. If you don't, pump till milk is flowing strongly, then rest till it slows down, etc. When the flow begins to slow even at pressure, stop pumping, let the milk continue to trickle a bit, then break the suction by gently squeezing one teat to let air into the cup. The two cups will fall off. Spray the teats and you're done.


 The most important part of the whole operation is this: you need to stay in touch with the goat. You are no longer hand milking, so you need to even more involved in assessing her udder - is it lumpy? Is it tender or sore? Discolored? I have not had any problems with bruising, mastitis, or anything else really, but I examine and check every single time because I want this to be as positive for the goat as it is for me.

Now - to improvising. 


All you really need are some kind of vacuum device (to create low air pressure), tubing, a jar with a sealable lid, and teat cups. None of them have to be special purpose built items.

I experimented with a setup without the nuts and barbs. I used a large nail to punch holes in the lid of a jar, and then  just stuck two pieces of aquarium tubing into the holes so they fit tightly.  When we pumped, it created a vacuum and milked the goat. It was pretty flimsy. Eventually the lid will deform too much to form a seal but so what? A lid might cost twenty cents, so if it only lasts a few months before I need a new one, I'm still doing OK. I could probably reuse lids from canned goods, which you aren't supposed to can with a second time anyway.


I was an idiot not to use Tattler canning jar lids right from the start.

These are heavy, solid plastic lids with rubber gaskets, designed for repeated canning use. Their rigidity makes them perfect in this application. Buy a box of them and can with the rest.
I bought a battery powered food saver pump from the thrift store ($3.99, I couldn't resist). I ended up using it all the time. I like it much better than the hand pump. 
Its orifice was too big for my tubing so I bought some 3/8" ID tubing and, using the boiling water trick, I slid it over the smaller tubing on the pump end. I connect the pump orifice into it and it works great - even easier on my tendons than using the manual pump.


While at the hardware store buying nuts and barbs, I snapped pictures of two other possible pumps: a mattress inflator/deflator that might work on deflation mode, and an automotive pump designed for both filling tires and starting siphons. That would be handy to have around anyway, n'est pas? On the other hand, there is already enough stuff in the world. I encourage you to look for something simple, nearby, and useful in other respects. If you camp, get the mattress pump. Save food? Plump for a food saver pump, etc.


I'm sure there are other things you can tinker with. Today I tried using Turkey Basters as teat cups. This would eliminate one of the specialty shopping trips from the process.

The basters worked reasonably well but are too long and narrow - they made attaching the milking arrangement a bit too awkward.


If anyone wants, I will happily ship you the assembled lid and teat cup part of this system (everything but the pump, the jar and the goat) for a very reasonable fee - contact me! But as much as I'd like the business, I secretly hope you don't take me up on it. I want you to really own this system, and that means owning the process of making it.

April 28 update to this story. We have had trouble with some of our milkers and heard from others who have the same problem. 

If you did everything as directed and it's not working, try using the assembly without the barbs. Stick the ends of the tubes in hot water and squeeze them through the holes in a mason jar lid. If this works, it means you may have a bad fitting hose barb.

Apparently not all Nylon Hose Barbs are created equal. You need to find one with a 5/8" or wider hex nut. This won't be written anywhere on the package, you have to measure. I don't think it's a specification for the hardware as it wouldn't matter in most applications but the extra width is what seals it tightly to the jar. If you can only find the narrower ones you might want to experiement with silicone caulking them around the top. Choose a food grade caulk. Let it dry and wash well before use. 

We've also had better luck with Brass than with Nylon nuts but I don't know if that is because we used the narrower barbs with the nylon nuts.By the time we figured out the barb problem we had used up all the nylon nuts.

One more error, I did not fully describe the barb. I'm going to write out everything on the package:
WATTS Nylon hose barb 
Lead Free
PL-326
Adapter 3/8" ID x 1/4" MIP
10 mm x 8 mm

I found this by trial and error. If you have other products that worked I'd love you to share!!


Shared on: fresh eggs daily, Barn hopsimplejoyfullivingbackyard-farming-connection, Wednesday fresh food linkup, wildcrafting wednesdayssimple lives thursdaysfrugal-days-sustainable-ways